There are two primary ways to collect attendee information - post purchase, or during checkout / add to cart. Information could be Name, Email, or other custom data such as t-shirt size, dietary restrictions, etc.
Decide how you want to collect information
Post purchase
Collecting info after the sale is highly recommended for maximum conversions, and is built into the app, ready to use out of the box.
- Purchaser transfers the ticket to the attendee (by providing name and email). An email is sent to the recipient.
- Purchaser updates ticket directly
The customer completes checkout, and their tickets are displayed on the Shopify order confirmation page. They will see another button to update their attendee details, which, when clicked, will allow them to answer all the questions you have specified. And/or, the customer may use the Transfer button.
How do ticket transfers work? When a customer purchases multiple tickets, they have the option to transfer extra tickets directly to their guests, after the purchase. The customer simply enters the Name and email of their guest, the guest receives an email with a link to complete registration, lands on the page to enter your custom fields, clicks save, and is then able to download their ticket. As a bonus, you grow your audience by collecting contact information of your customers’ guests.
Demo
Visit this product page and complete checkout to try out the ticket transfer system yourself.
https://event-productions-inc.myshopify.com/products/collecting-attendee-information-demo
How to set up and configure
Most of the settings are configured on the Ticket type:
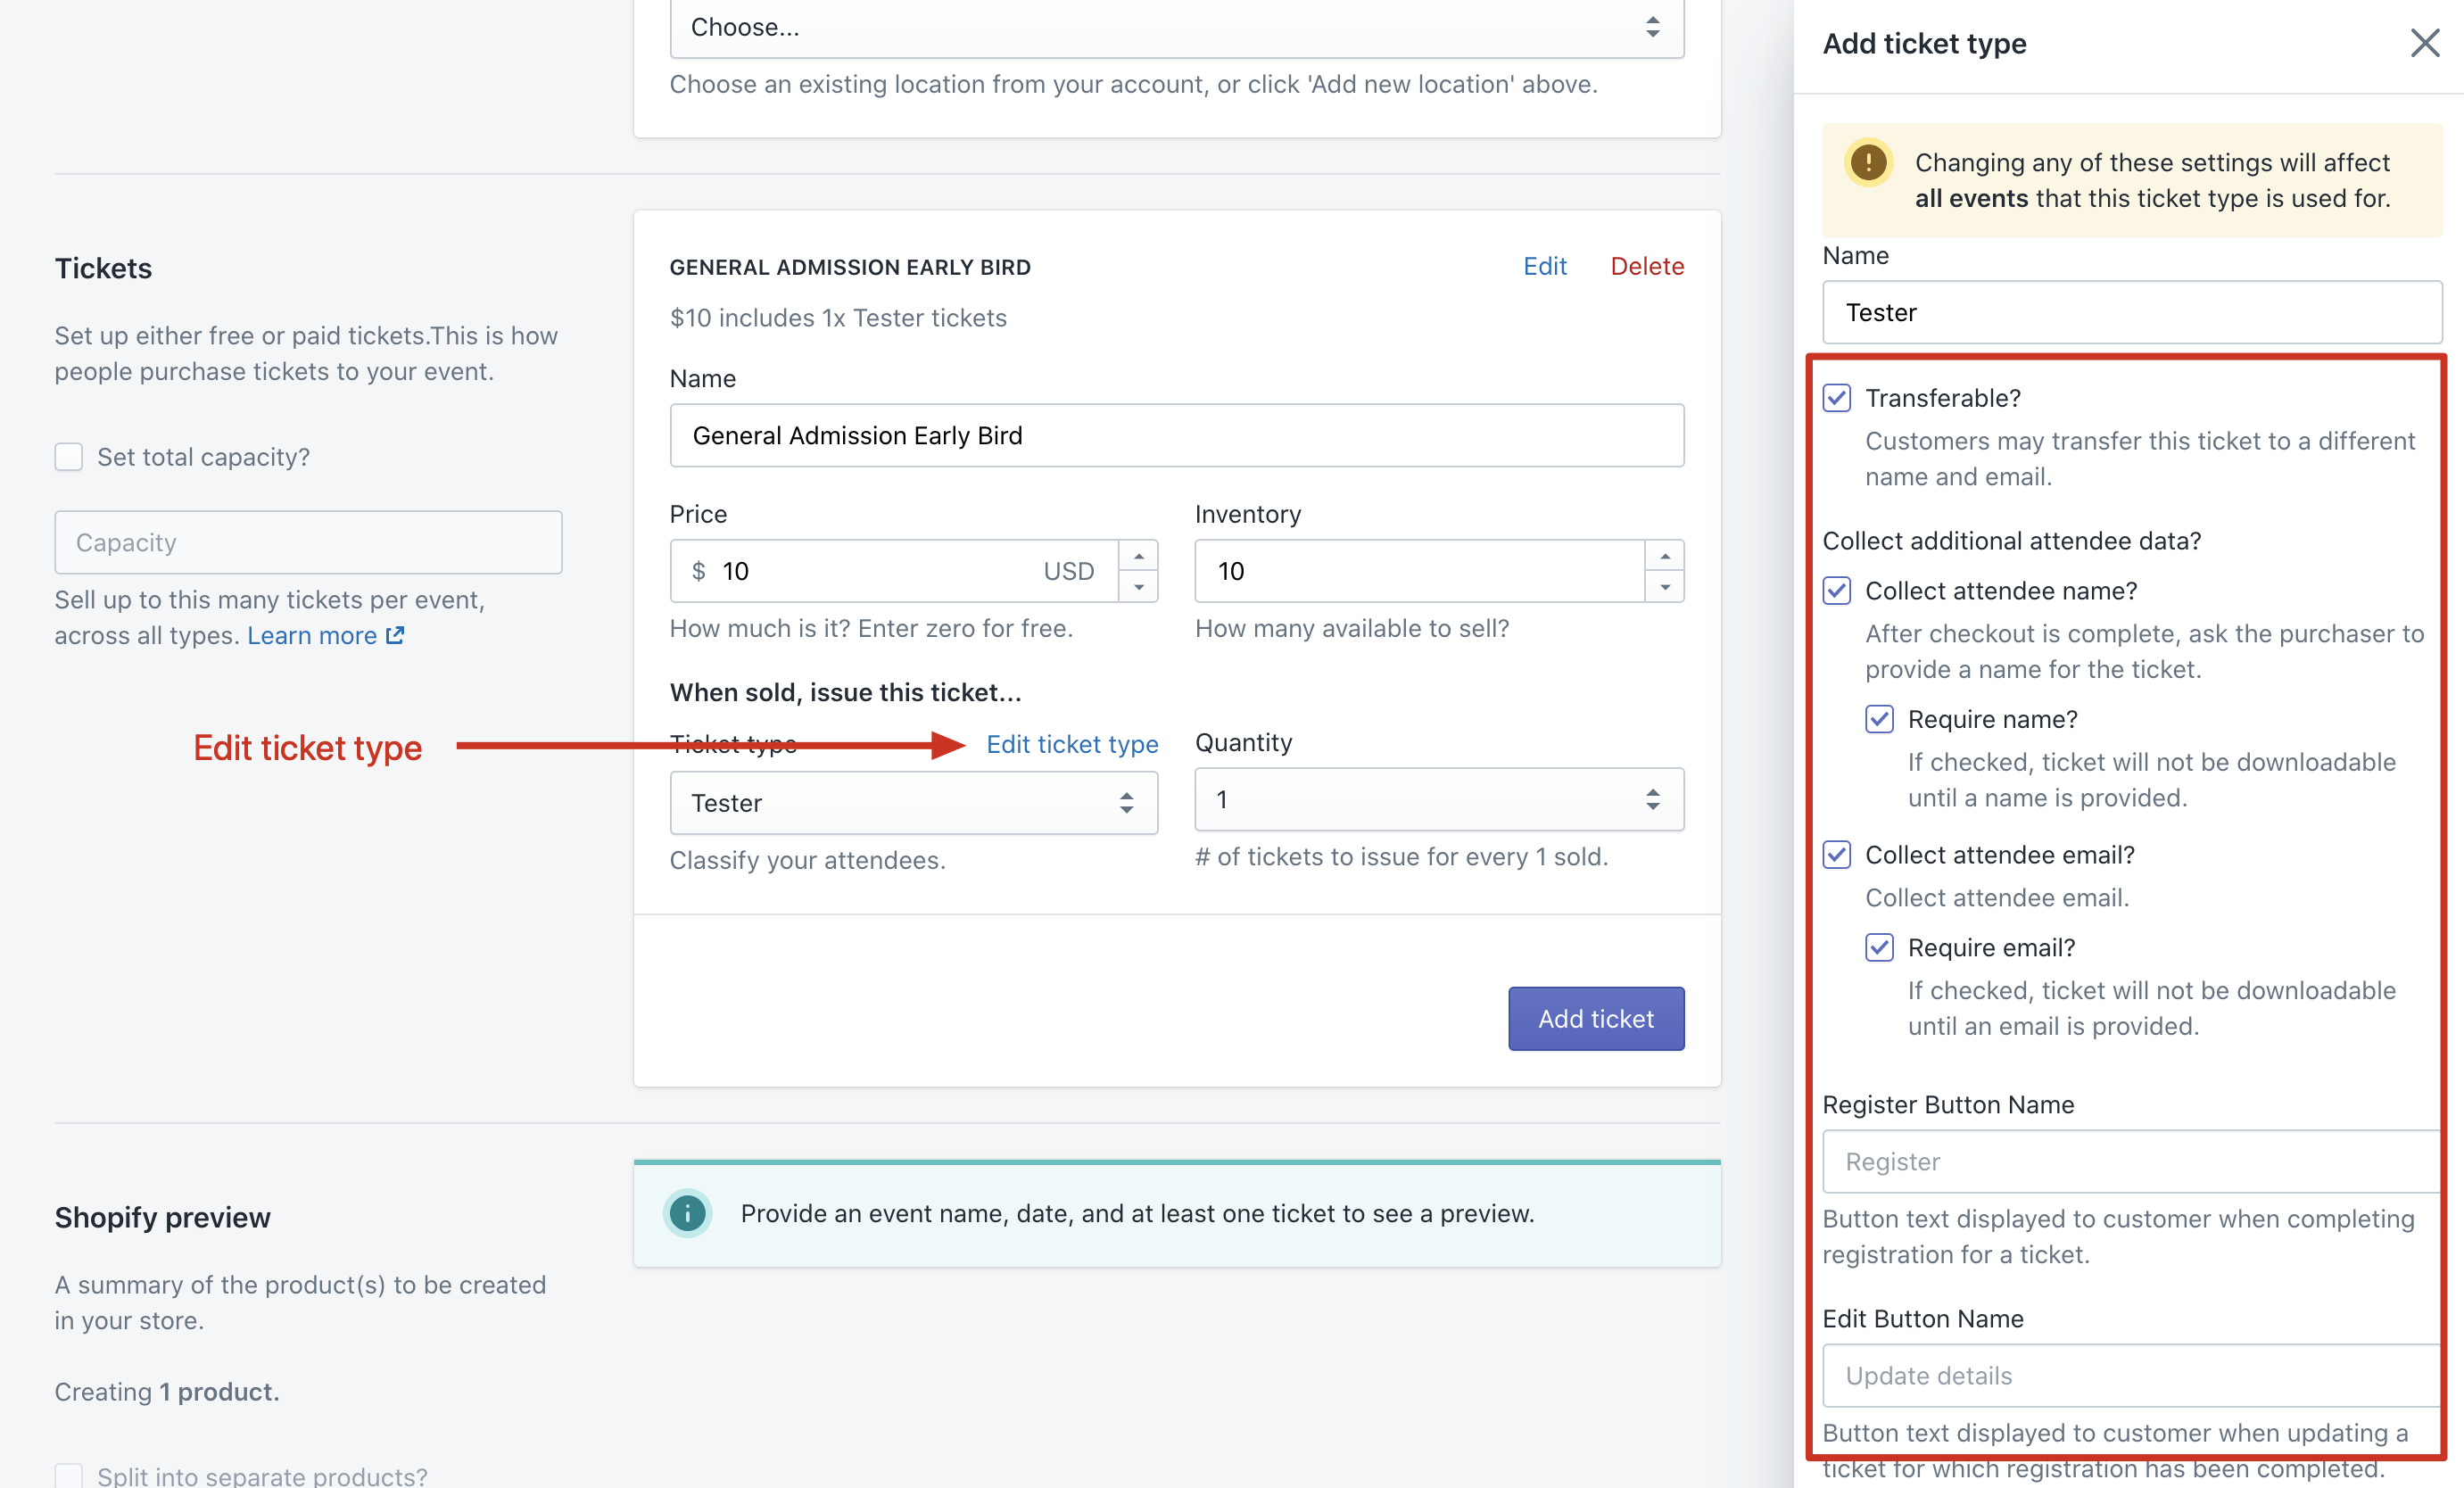
Settings
- Transferable: Enabling this will display the “Transfer” button for that ticket. The responsibility of filling out any custom fields or questions you have is then delegated to the ticket transfer recipient.
- Collect additional attendee data: If any of these checkboxes are enabled, then the button for updating the attendee details will be displayed. The difference from transferring the ticket is that the purchaser simply fills in the info themselves, and prints the tickets themselves. Whereas with transferring, the transfer recipient will do all of those tasks.
- Register and Edit button: If collect additional attendee data is enabled, then these buttons will be displayed. You may change the names of these buttons depending on your needs or use-case.
Collecting other custom fields
If you want to collect other info, such as T-Shirt Size, Dietary restrictions, License plate number, or whatever, then you need to set these up as Ticket Custom Fields in the backend using the Guest Manager app (only available on the Advanced Plan or higher).
Custom fields and questions is currently set up through our external app, which is only available on paid plans (Premium or Business). We may consider bringing this feature directly into Shopify, but for now, it must be configured in the external app.
During checkout
Collecting info during checkout is not recommended for a few reasons:
-
It will cause you to lose sales (the customer has to put in extra information, which they may not even know at time of purchase)
- Is more work on your end (you need to use a third party app and/or modify your theme to collect “line item properties”).
- You can only collect fields for a single ticket. If a customer adds multiple tickets to their cart, you cannot collect separate info for each ticket.
What you need to do: ensure your custom attendee information is added to the line item as Line Item Properties. Learn more here: https://shopify.dev/docs/themes/liquid/reference/objects/line_item#line_item-properties
Using a third party app
Apps that add custom line item properties can be used, such as Infinite Options
Property names
There are a couple of system fields you can use: Name and Email. If the property name matches Name or Email, then the value will copied to the appropriate system field. For all other field names, the property will be copied to the ticket as a Custom Field. For example, “T-Shirt Size” or “Dietary restrictions” would be copied as custom fields.
- Generate your own UI elements here: https://ui-elements-generator.myshopify.com/pages/line-item-property
Property examples
Name
<p class="line-item-property__field">
  <label for="name">Name</label>
  <input required class="required" id="name" type="text" name="properties[Name]">
</p>
<p class="line-item-property__field">
  <label for="name">Email</label>
  <input required class="required" id="name" type="text" name="properties[Email]">
</p>
Dietary restrictions (custom ticket field)
<p class="line-item-property__field">
  <label for="name">Dietary restrictions</label>
  <input required class="required" id="name" type="text" name="properties[Dietary restrictions]">
</p>
Use properties to get ticket Add-ons (Pickups)
Another feature Guest Manager offers is the ability to create ticket add-ons via properties. Product pickups help you track fulfillment of add-ons during check-in or scan. Examples of pickups could be “Bag of Popcorn”, “Gift Bag”, etc.
Learn more about Product pickups
How to setup
You will need the Advanced Plan or higher to configure Product Pickups using the external admin app.
- Go to the Guest Manager backend. (The “Manage in Backend”) link from the event in Shopify.
- Go to Design and setup > Product pickups
- Configure your products and click save.
-
Now, use the Line item properties just the same as before, but make sure the property name matches exactly the name of the Product you configured. The properties can be configured 1 of 2 ways: Option 1: The Property Name matches the Product Name exactly, and the value is a number, i.e. the quantity of pickups to create for that product.
Option 2: The Property Name can be whatever you want, and the Property Value matches the Product Name exactly. This will always create 1 pickup for that product.
Tips
You will likely not want to expose these properties as inputs on the product page, because these properties are worth money and you likely want to charge for them. Some of my clients have had success using the app Advanced Product Options which will add custom line items to order (charging for the pickups), and assigning the line item properties to the correct ticket line item.
