Events are the foundation of Guest Manager. Without events, you can’t really do much.
One off events
This is the most common, and likely what you need. If you have an event on a single day, occuring at one time, this is for you.
- Concerts
- Single day festivals
- Corporate events
- Conferences
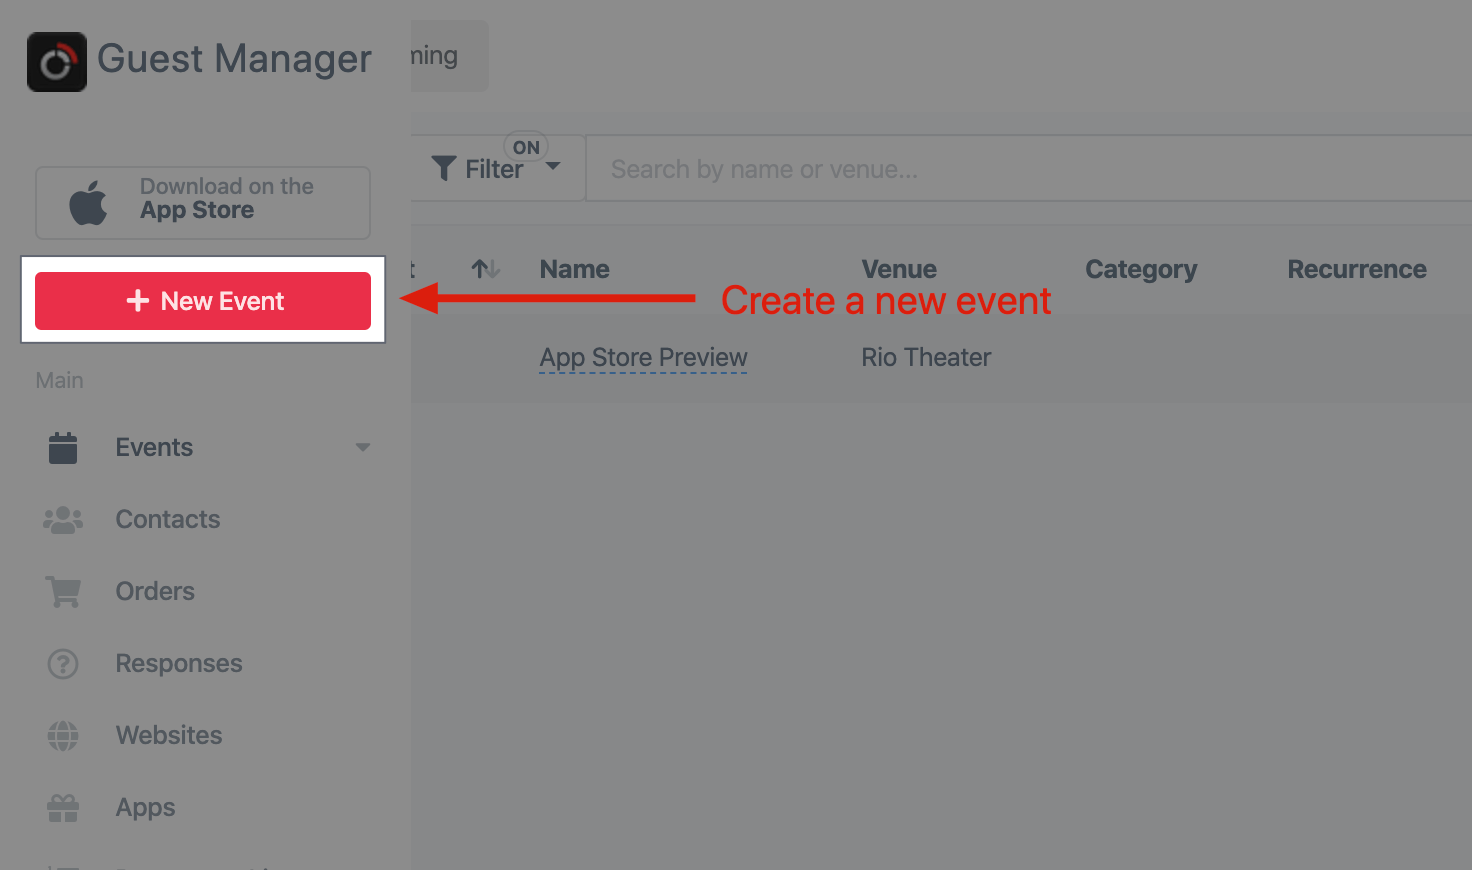
The new event window is available from a variety of places. Here’s one:
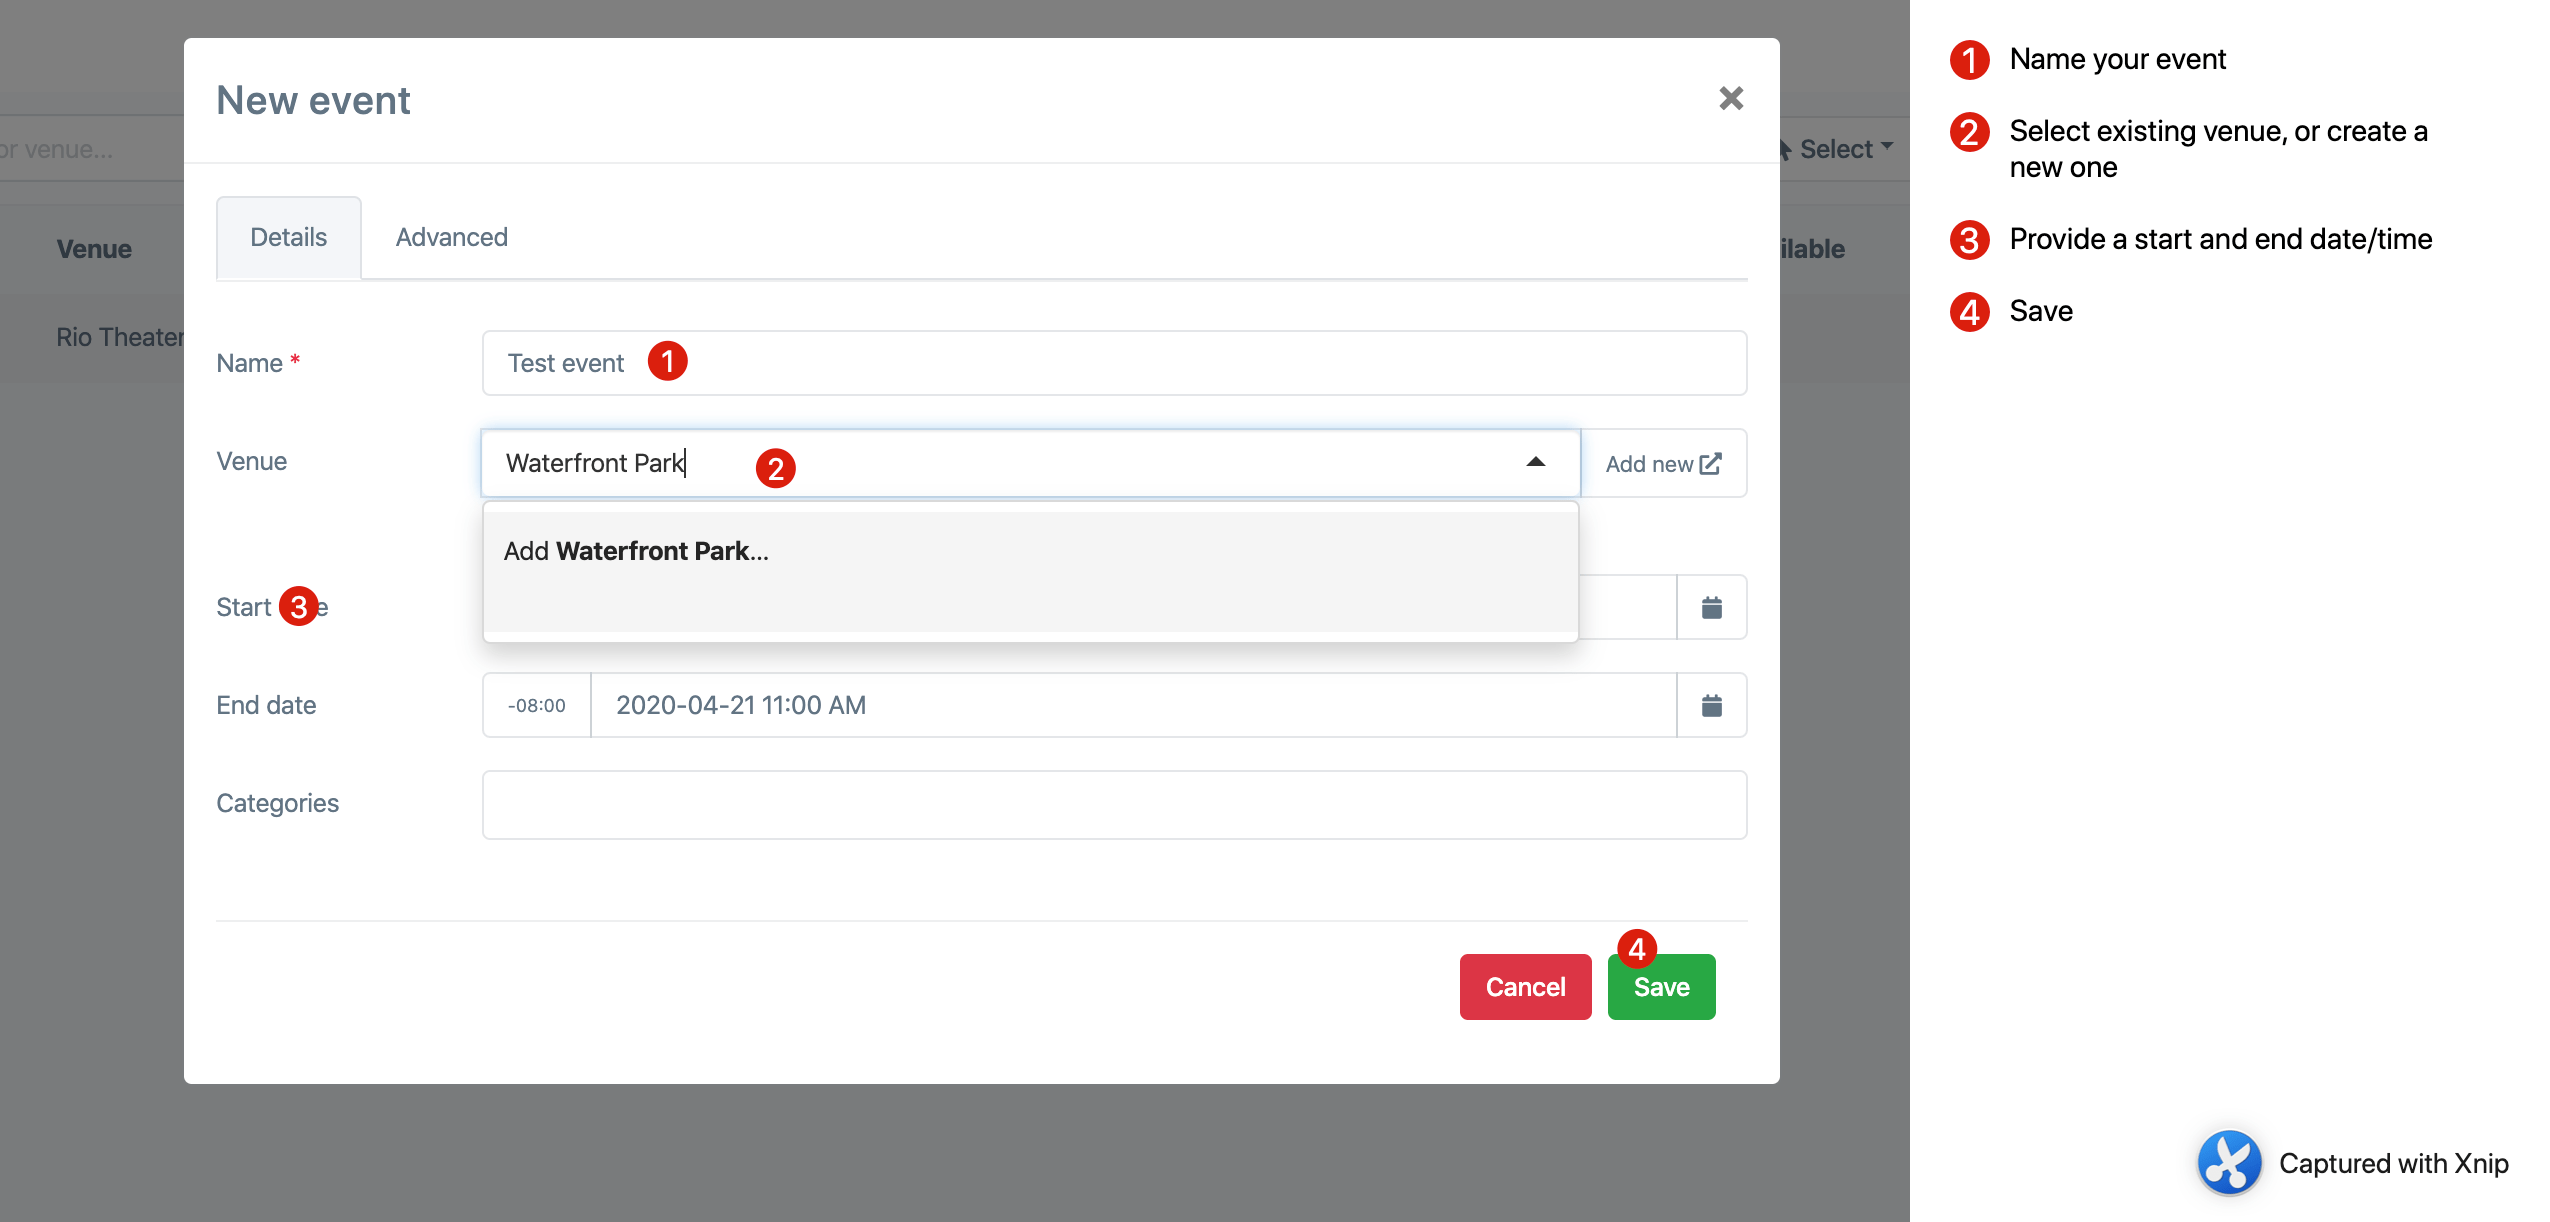
Provide 4 simple fields to create an event:
- Name
- Venue
- If the venue is already listed (created from a previous event), go ahead and select it
- If not, type in the name of the venue and click Add [name of venue]…
- You will be presented with another popup to specify the Time zone of the venue. Then click save.
- Start date and time
- End date and time
Easy peasy, lemon squeezy. All done.
Multi day/time events
This option lets you create “an event within an event”. Even if you only have two or three days, such as a weekend festival, it is beneficial to set it up as a mutli-day event so that settings are shared between events (ticket designs, etc).
Appropriate for:
- Tours
- Conference sessions
- Multi day festivals
- Classes, workshops
If you have a mutli-day event such as a 2 day conference, but will only check the attendee in on the first day, it would be simpler and make more sense to create a one-off event.
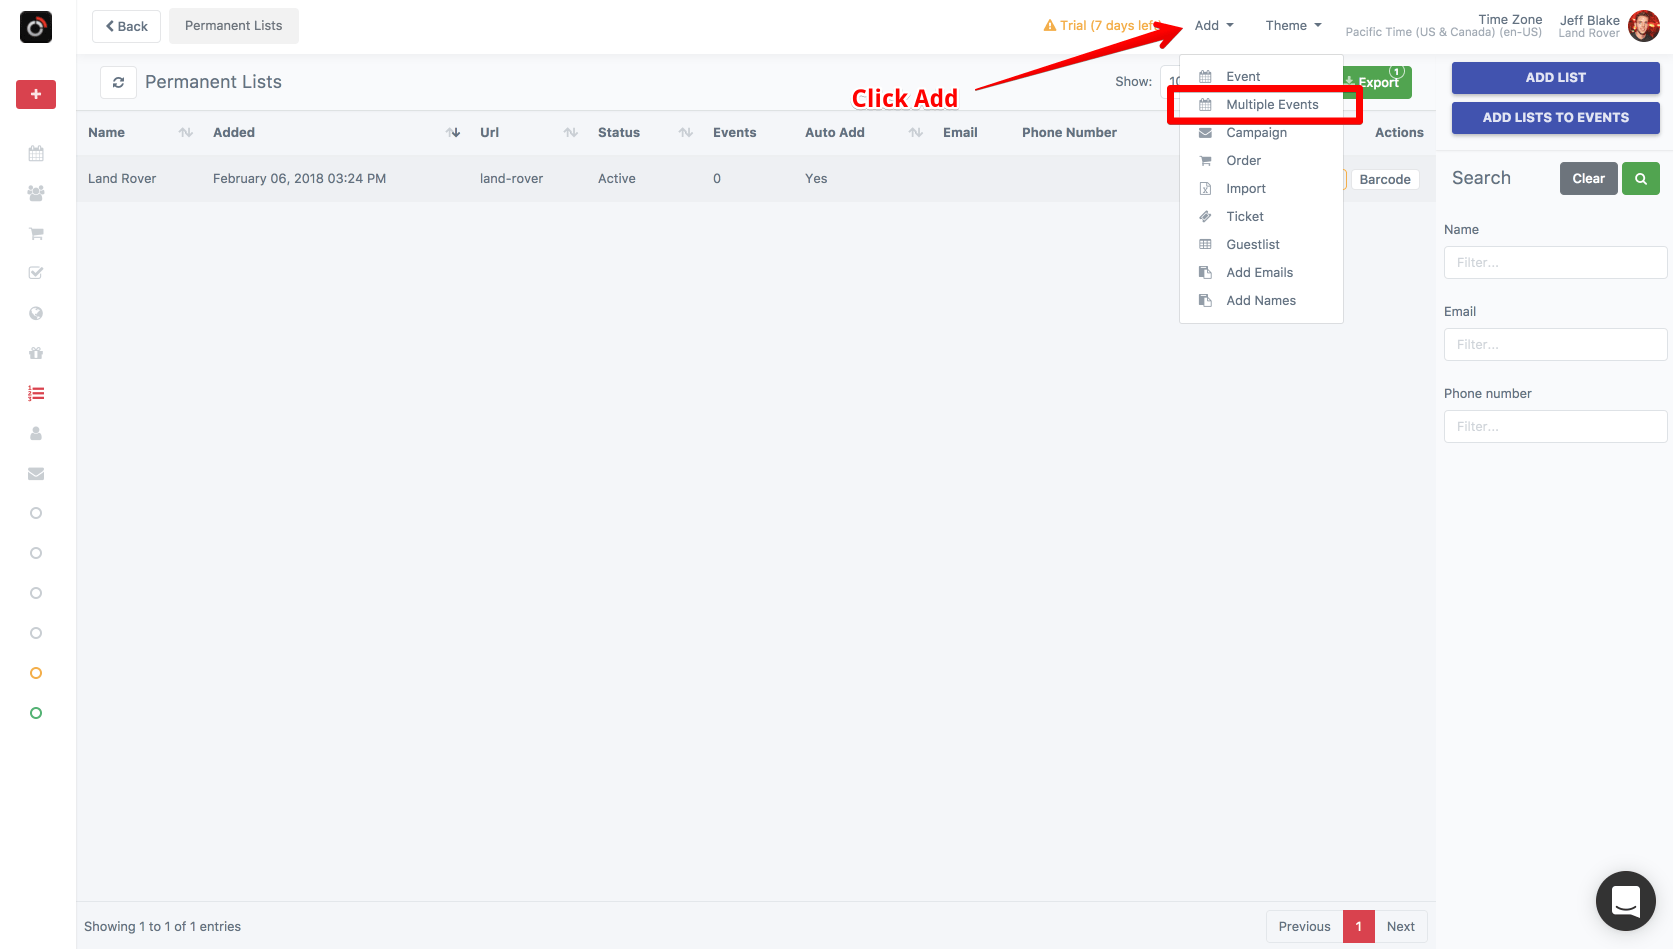
Step 1 - Open the window
Click the “Add” link on the top right of the menu bar. Then, select “Multiple Events”
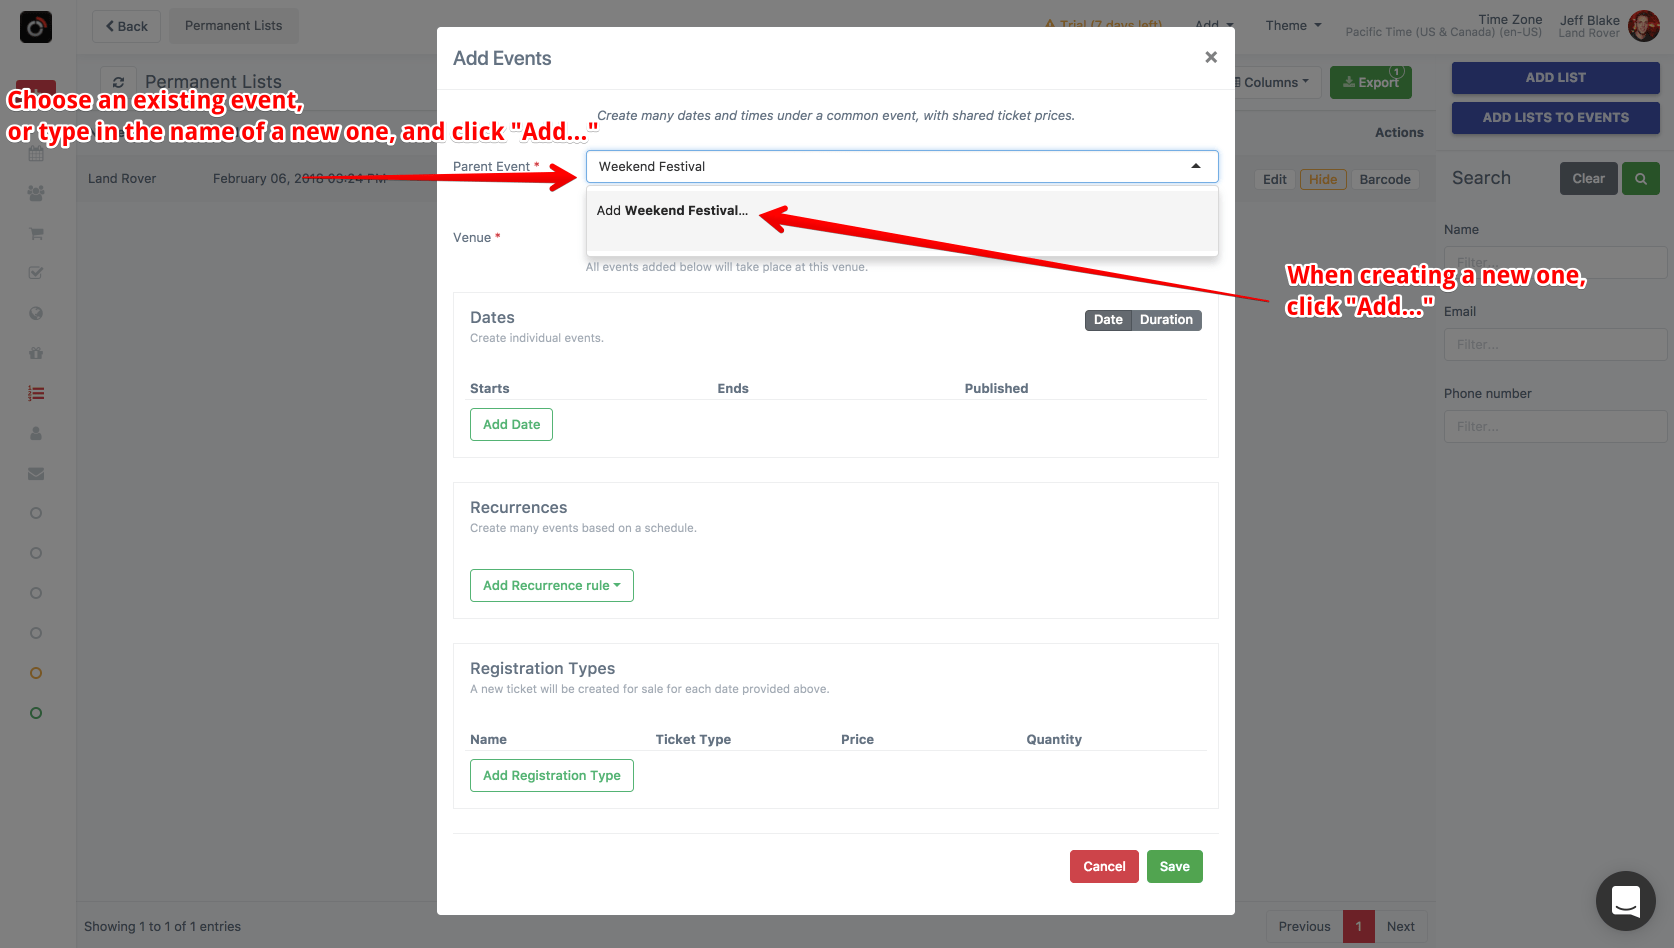
Step 2 - Choose or create a parent event
For the “Parent Event” field, select an existing event from the dropdown to add more dates to an existing event. To create a new event, as we will show here, start typing the name of your new event, and then click “Add…”
What is a good name? This name should be non-date specific. For example, “My Conference 2018”, “Weekend Festival”, etc are all good names to use.
Step 3 - Choose or create a venue
Choose the venue where these events will be held. If your venue is not listed, type in the full name, and then click “Add”.
Existing venue
From the venue dropdown, simply choose one of your pre-existing venues. If the list is long, you can use the search function.
New venue
Venue not listed? Type in the full name of the venue, and then click “Add [venue name]…”. From the subsequent popup, select the time zone and click save. The rest of the fields are optional.
Step 4 - Add dates
Adding dates (events) can be done by specifying dates individually in the “Dates” section, and/or you can setup recurring events in the “Recurrences” section. For example, if you want your event to occur every Monday, Wednesday, and Friday at 6PM, you would add a “Weekly” Recurrence. On the other hand, if you know exactly your event will occur on a specific Friday, Saturday, and Sunday, then add each of the three dates in the “Dates” section. Details below.
Adding individual dates
If you only have a few dates, for example a weekend festival, then use the “Dates” section to add dates.
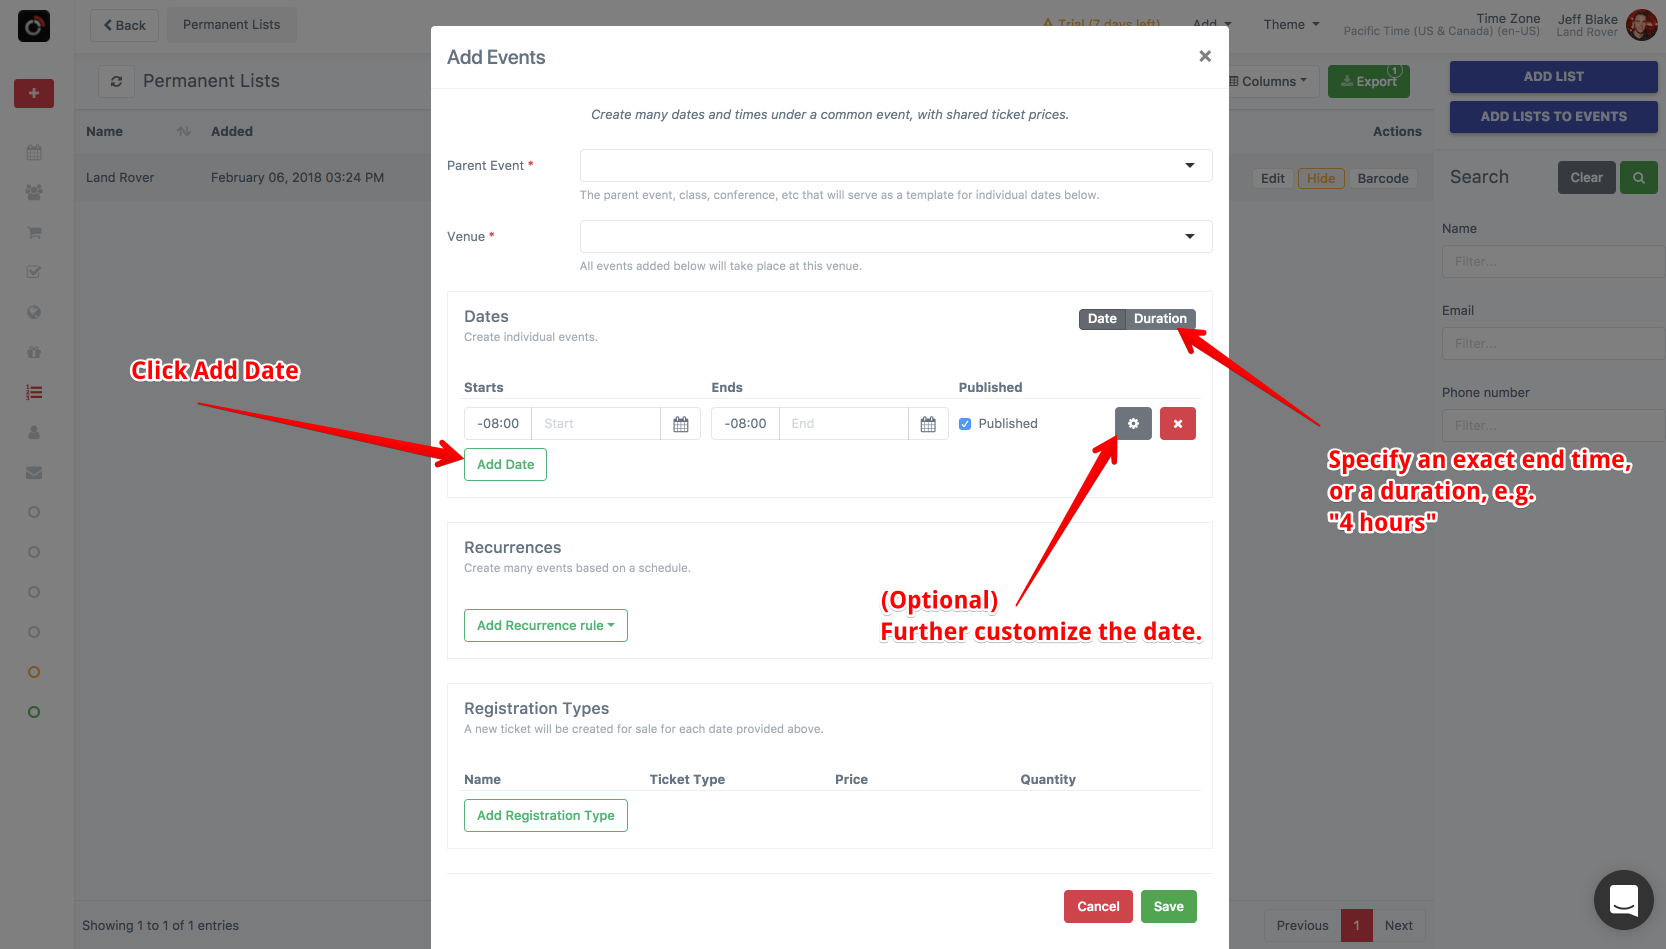
Click the grey “gear” icon next to the red delete button for a date to further customize. For example, each date will share the same name as their parent event by default. To override this name, click the gear icon.
- Name: Let’s say you have a parent event called “Weekend Festival” on Friday, Saturday, and Sunday. It may be handy to name each individual day “Friday Day 1”, Saturday Day 2”, etc.
- Registration types: You can specify registration types that only apply to this particular date.
Adding recurring events
“Recurrences” are discussed in a separate article here:
If you do not need to have events automatically created for you, based on a schedule, then you may ignore the “Recurrences” section.
Step 5 - Adding registration types
Registration types allow you to sell tickets, free RSVPs, registrations, etc. If you do not need this functionality, you may skip this step.
Registration types added to this section will be added to all of the dates specified above, as well as any specified Recurrences. If you want to offer specific registration types available only to a particular date, then click the settings icon (“gear”) next to a date (added in Step 4).
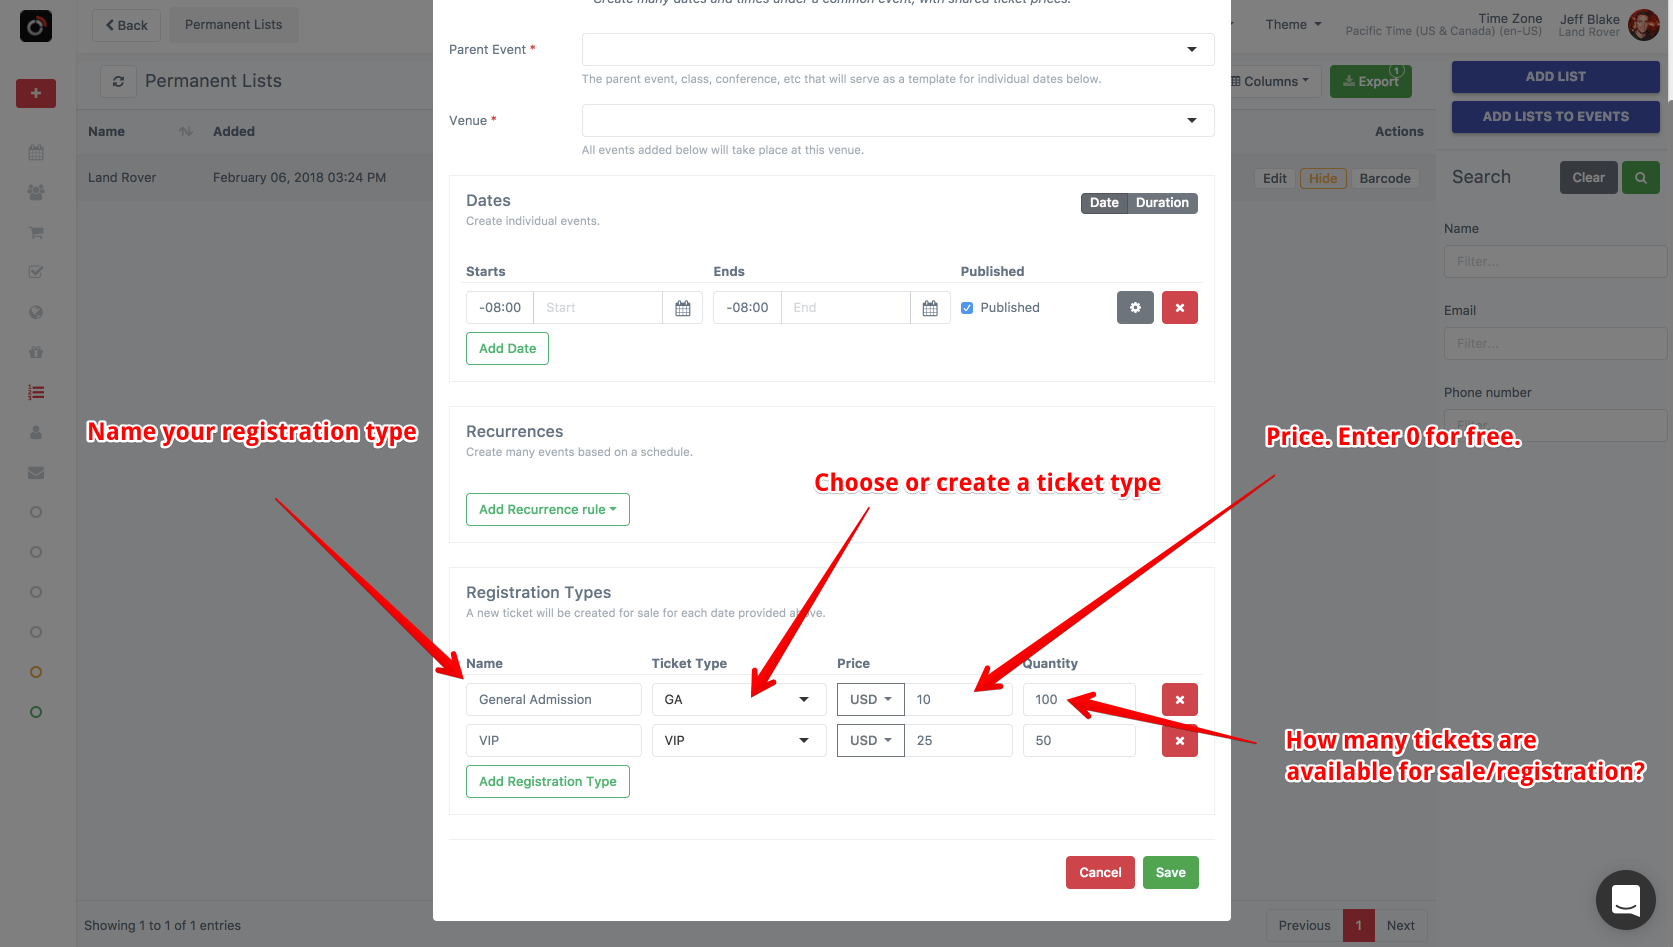
- Name: Shown on the registration page. This is typically a slightly more verbose version of the ticket type. Examples: General Admission, General Admission Tier 1, RSVP, Ticket, Registration
- Ticket Type: The kind of ticket to issue the guest. This is shown on the registration page, and more importantly, shown on the check in app (whereas the Name is not). Try to keep this short, 2 to 20 letters. Ticket types are re-usable across events, and serve as a template for some common settings (e.g., how the PDF and Apple Wallet looks).
Examples: GA, VIP, RSVP, Ticket, Pass. Best practices: 2-20 letters, Generic, Not event specific. I.e., “Friday Ticket”, “My Weekend Conference Pass”, etc are bad choices.
- Price: How much does one of these tickets cost? For free tickets, or RSVPs, enter 0.
- Quantity: How many of these tickets are available? If your capacity is for 300 GA tickets, then enter 300. For unlimited tickets, leave this field blank.
Name, price, and quantity can always be adjusted later.
Final Step - Review and submit
Take a moment to check all the dates, tickets, prices, etc. When you are ready, click “Save”.
Recurring events
Create events automatically based on a repeating schedule. The previous two options require that each time slot (event) be set up individually. With recurring events, you may specify a repeatable schedule: e.g. daily, every Tuesday on the 3rd week of the month, etc.
