Shopify merchants must do refunds and exchanges from within their Shopify admin!
From attendee list
Refund or void
A ticket that was issued as part of an order is eligible to be voided (if the purchase price was zero), or refunded (if the purchase price is greater than zero).
Tickets not issued through an order can be invalidated or deleted. See relevant article about the differences of those two options.
Locate the ticket you’d like to void or refund
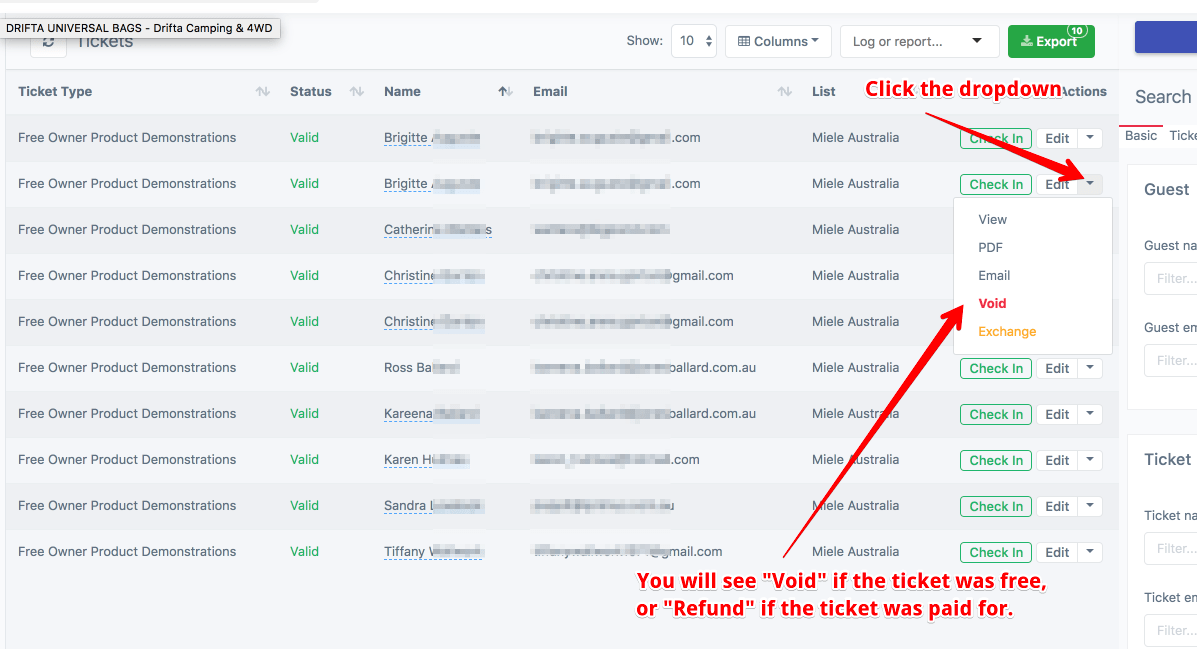
From the dropdown button next to “Edit” select either Void or Refund.
Repeat process for any other tickets belonging to the same guest.
A new slot will automatically open up for the event after refunding or voiding the ticket.
Tickets that were issued through an order are eligible to be exchanged, voided, or refunded. Learn more about Orders here.
Exchange for another event or type
Step 1 - Locate the ticket to be exchanged
From the “Tickets” section of your event, find the ticket you’d like to exchange.
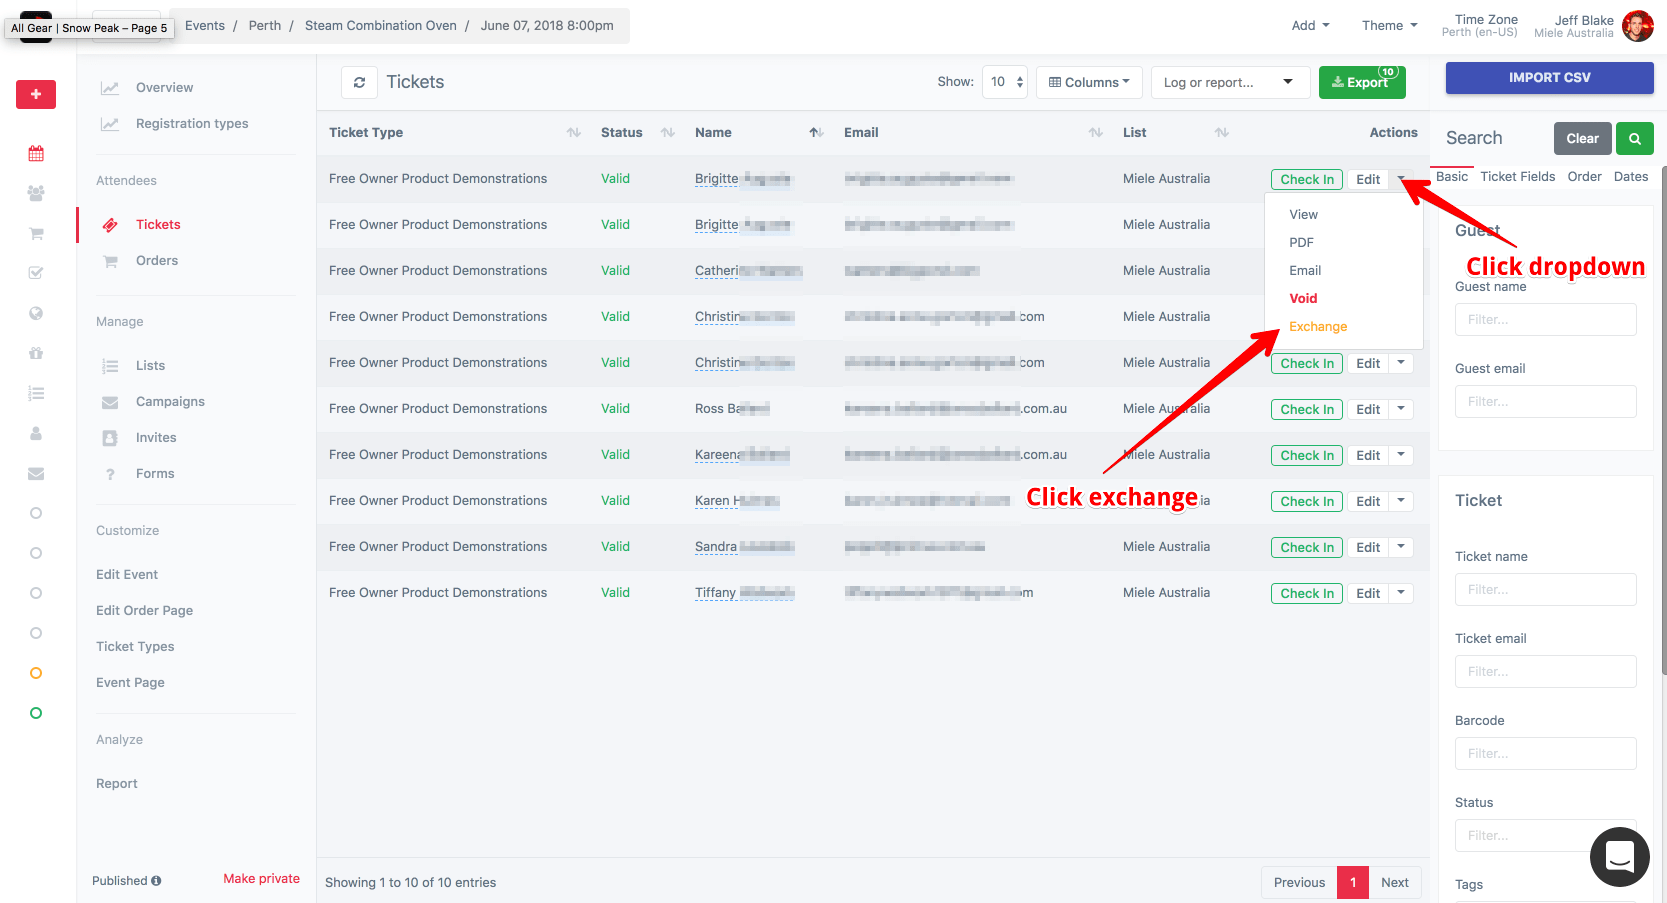
Step 2 - Click Exchange
From the dropdown next to the Edit button, click the yellow “Exchange” button.
Step 3 - Find the ticket you’d like to exchange for
Click on the “Find…” button. This menu will help you efficiently locate the correct exchange item, saving you from searching through a long, single, flat list.
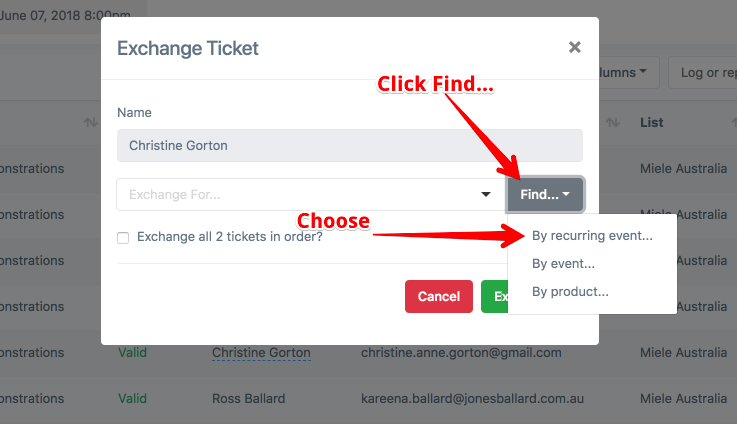
- By Recurring Event: Choose this option if you’d like to exchange the ticket for another class.
- By Event: If the exchanged ticket is not for a recurring event, use this method.
- By Product: Not relevant in this case.
Step 4 - Review options
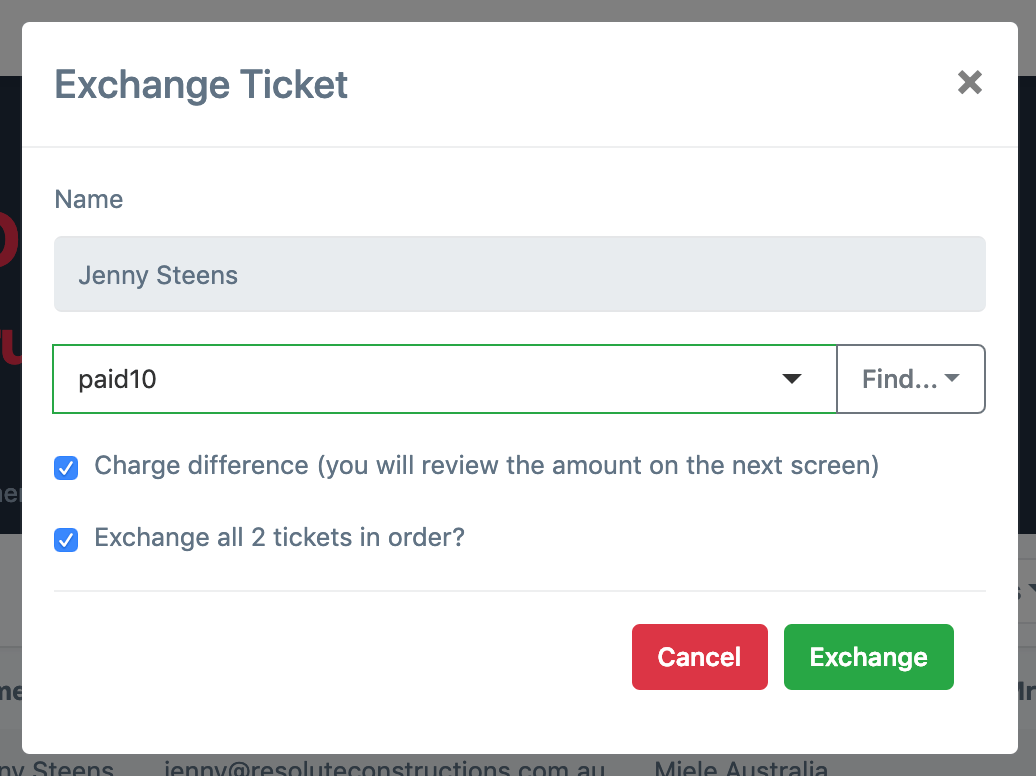
Charge difference
If the item being exchanged for costs more than the item being exchanged, you will be presented a checkbox asking if you’d like to charge for the difference. If enabled, the system will redirect you to a new order, with a pending payment pre-created for review. Process the payment and complete the order to finish the process.
Refund difference
If the new item costs less than the original item, a check box will appear asking if you’d like to refund the difference. Once the form is saved, the refund will be processed automatically and no further action is required.
Exchange all tickets in this order
Note the checkbox for “Exchange all tickets in this order”. Enable this if you’d like to also transfer the other guests tickets to the new event. Note: you will only see this option if there are more than one ticket in the order.
Step 5 - Click exchange!
Click Exchange when you are ready. This action cannot be undone. By returning the original ticket, a new slot will open for the old event.
For convenience, a button will appear in the top right of your screen when the exchange has completed, allowing you to jump quickly to the exchanged event. If you enabled the charge difference option, you will instead be redirected to the new order, to finalize.
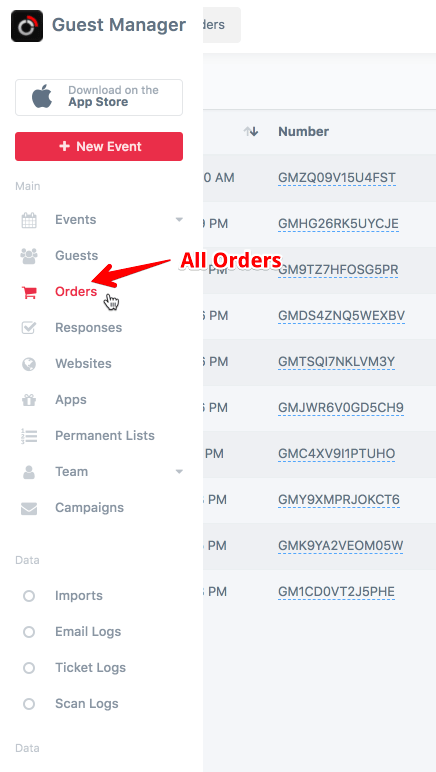
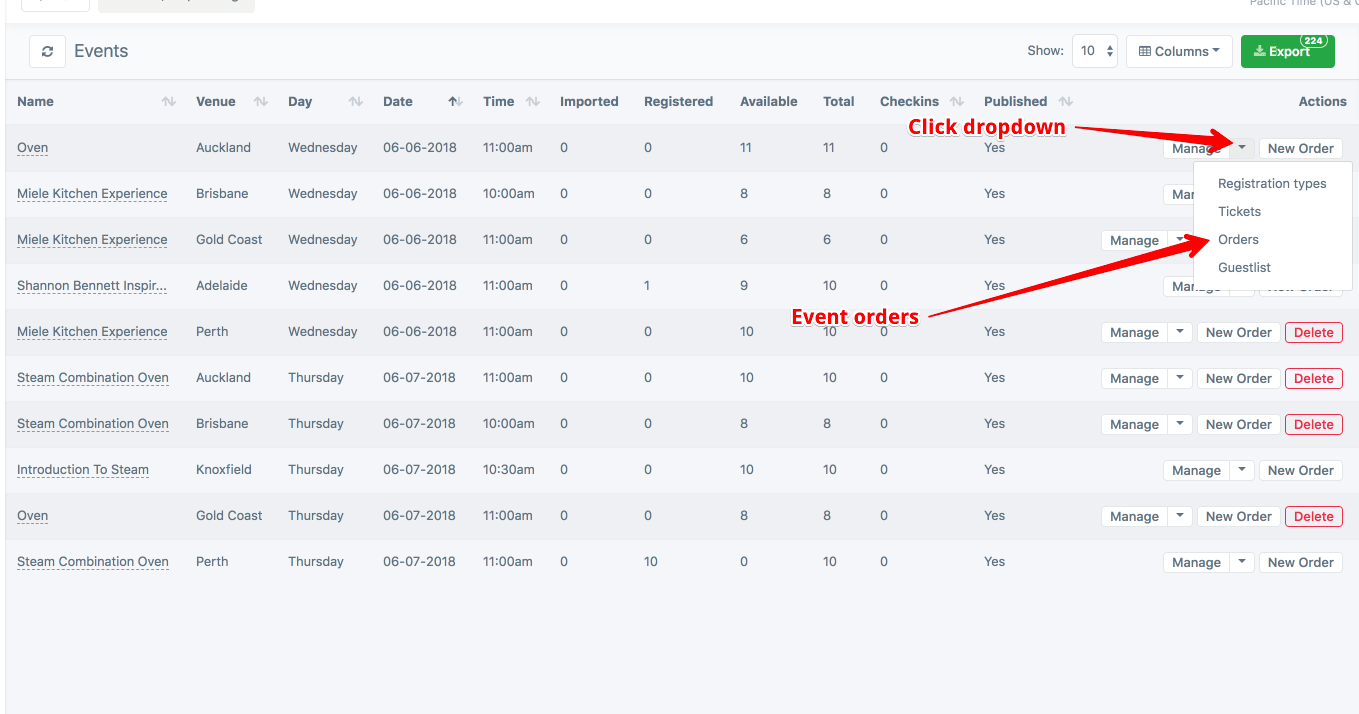
From order list
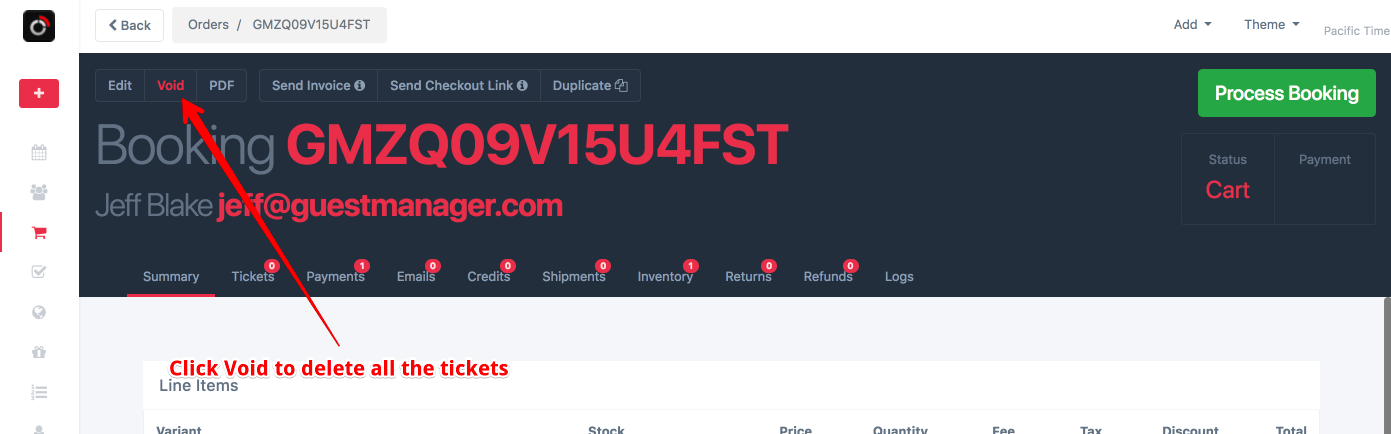
Void an order
All of the tickets in an order can be deleted in one action by voiding an order. Only free orders can be voided. If the order has a payment, then it must be refunded to achieve the similar effect (of deleting the tickets).
Locate the order
You can look up an order from the “Orders” menu on the left (all orders), or from within an event.
All orders
From an event
View the order, select “Void”
Issue a full refund
For paid orders, there is an easy one-click way to issue a full refund, and do subsequent cleanup like deleting the tickets, and re-adding those tickets back into the pool of available tickets to be purchased.
Locate the order to refund
Follow the tutorial here to lookup an order.
View the order, and click Refund
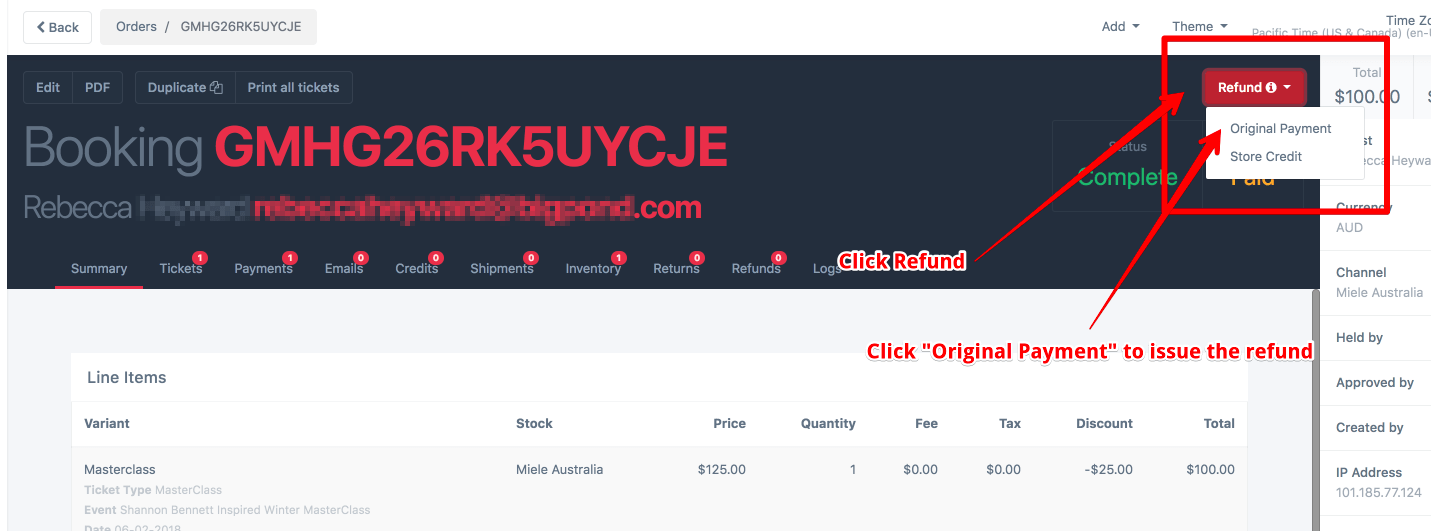
Original Payment: Refunds the money back to the payment method used, i.e. a credit card refund Store Credit: Does not issue a refund, but rather adds a credit to the customers account, that can be later used in a different order.
Issuing a partial refund
If you’d like to issue a partial refund, as opposed to a full refund, learn how here.
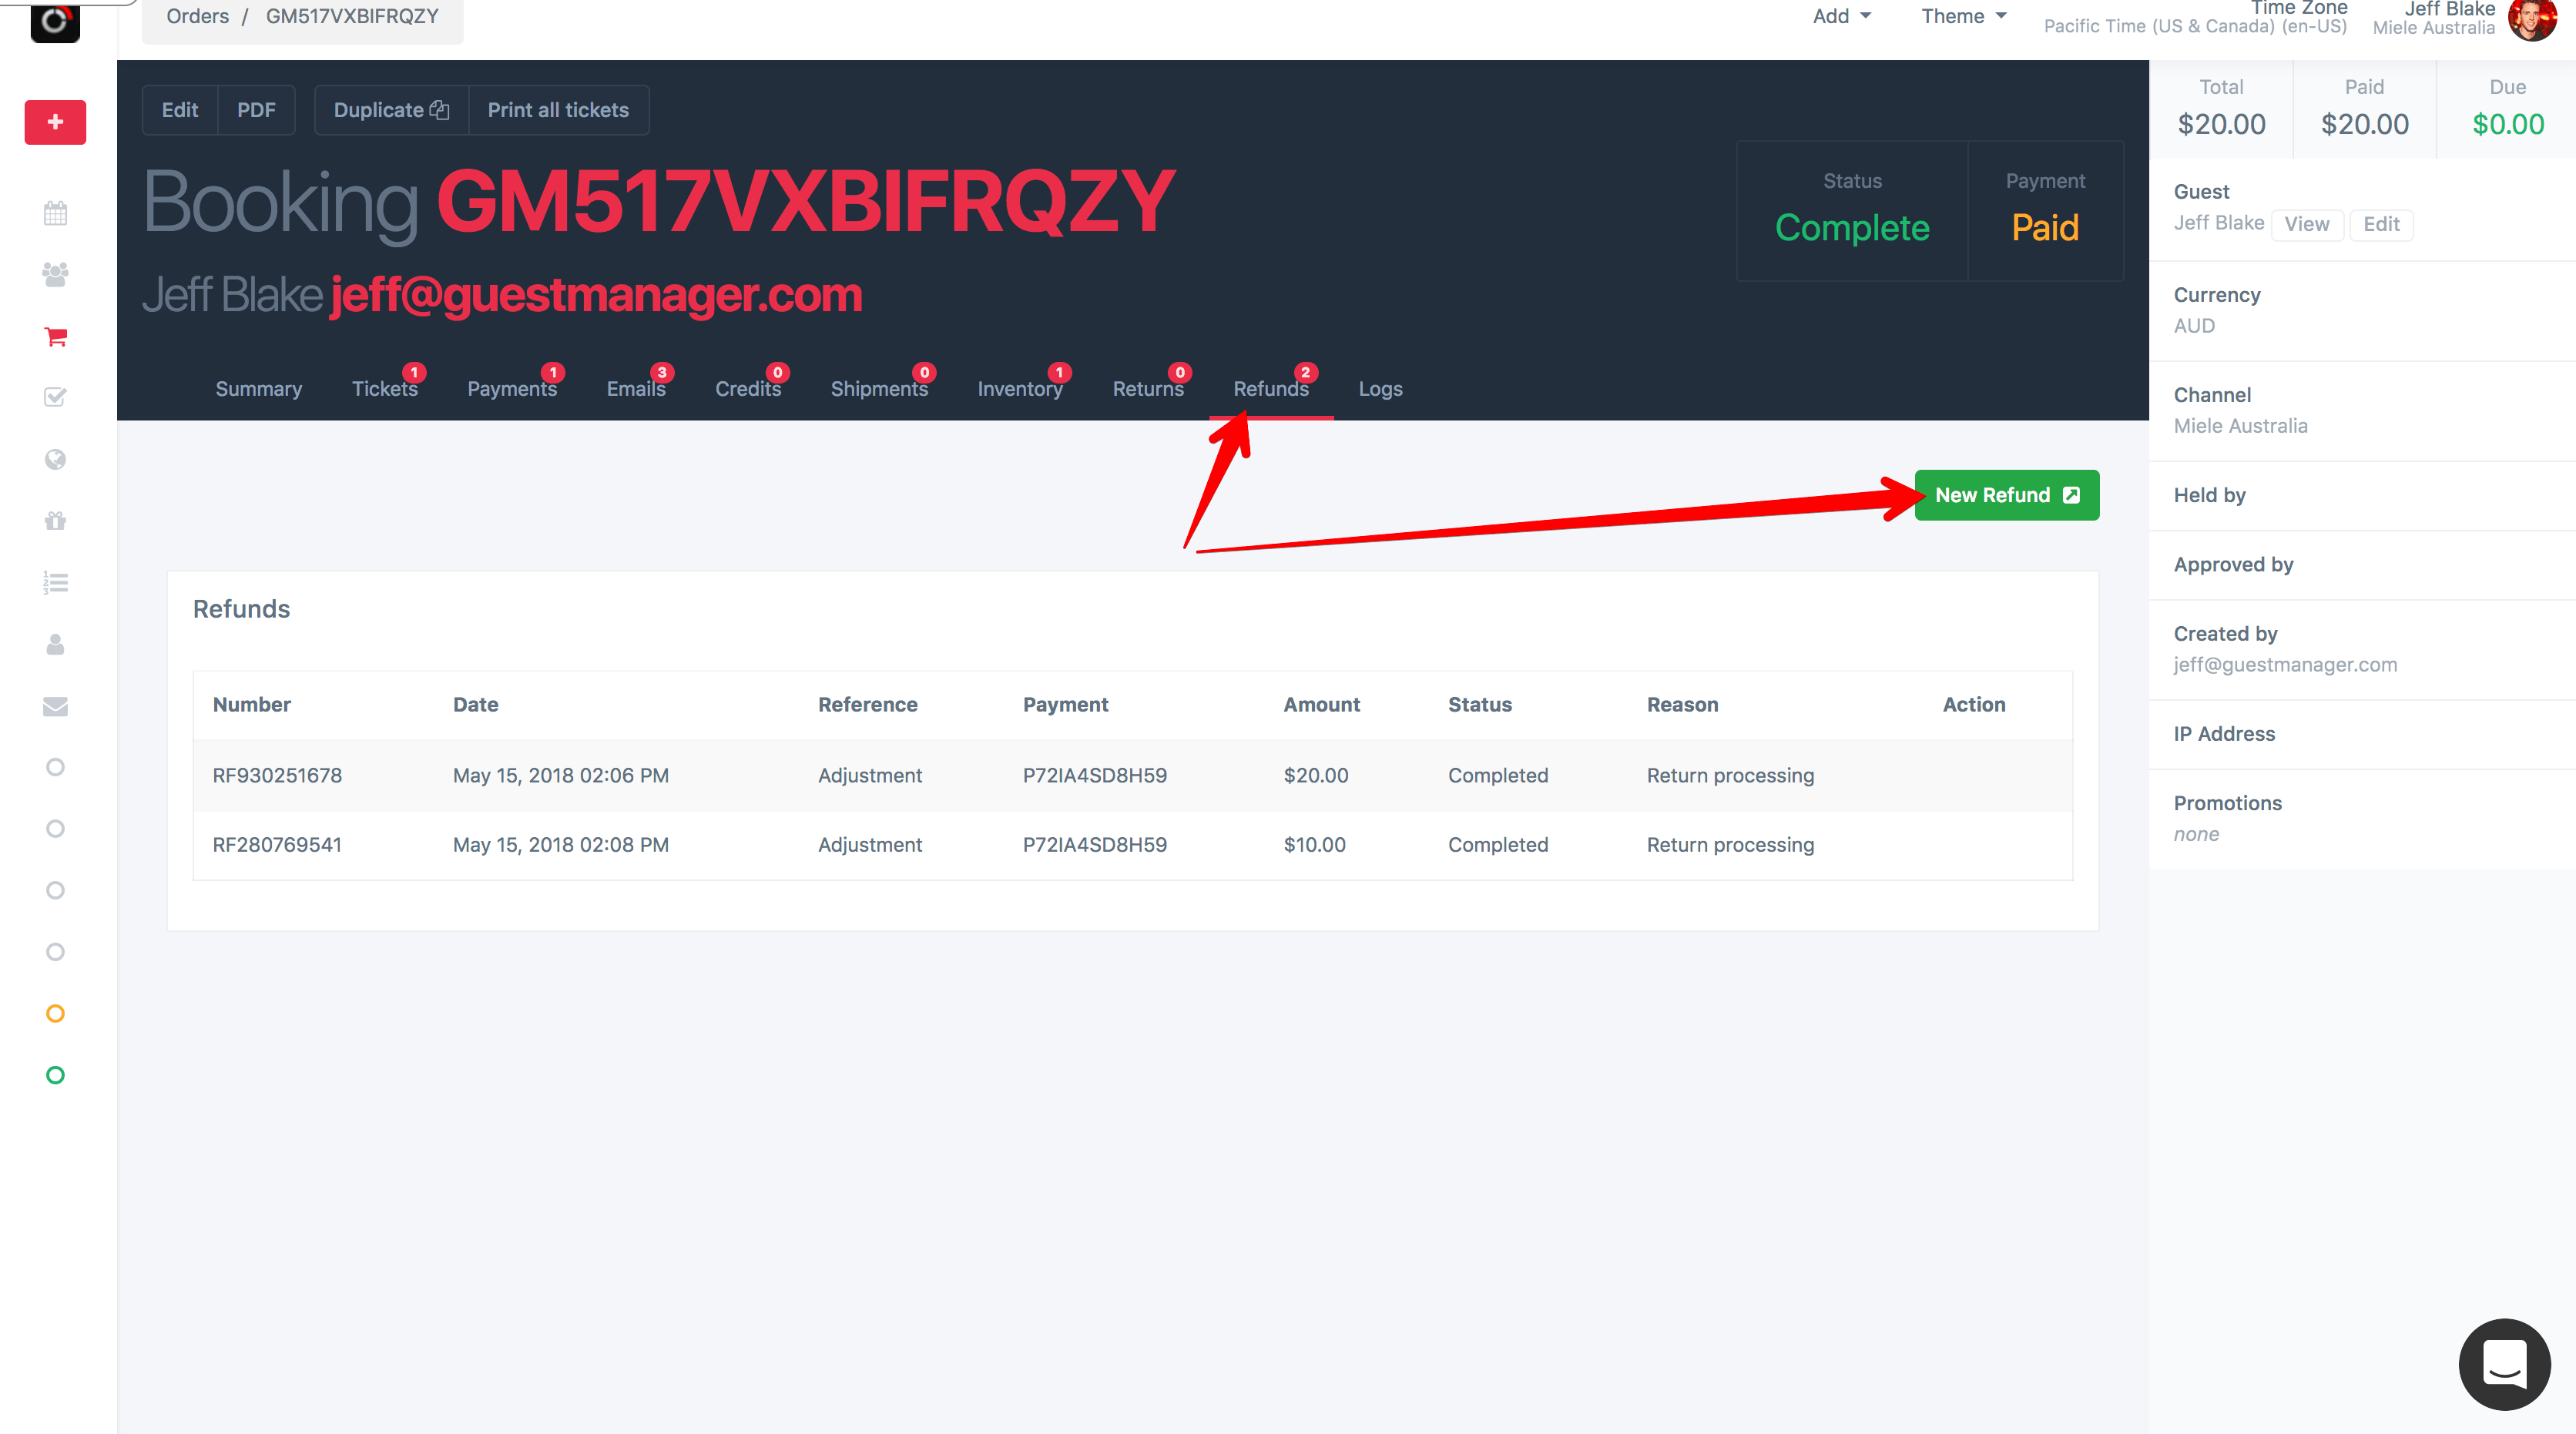
1. Navigate to refunds, and select “New Refund”
2. Fill in the refund fields
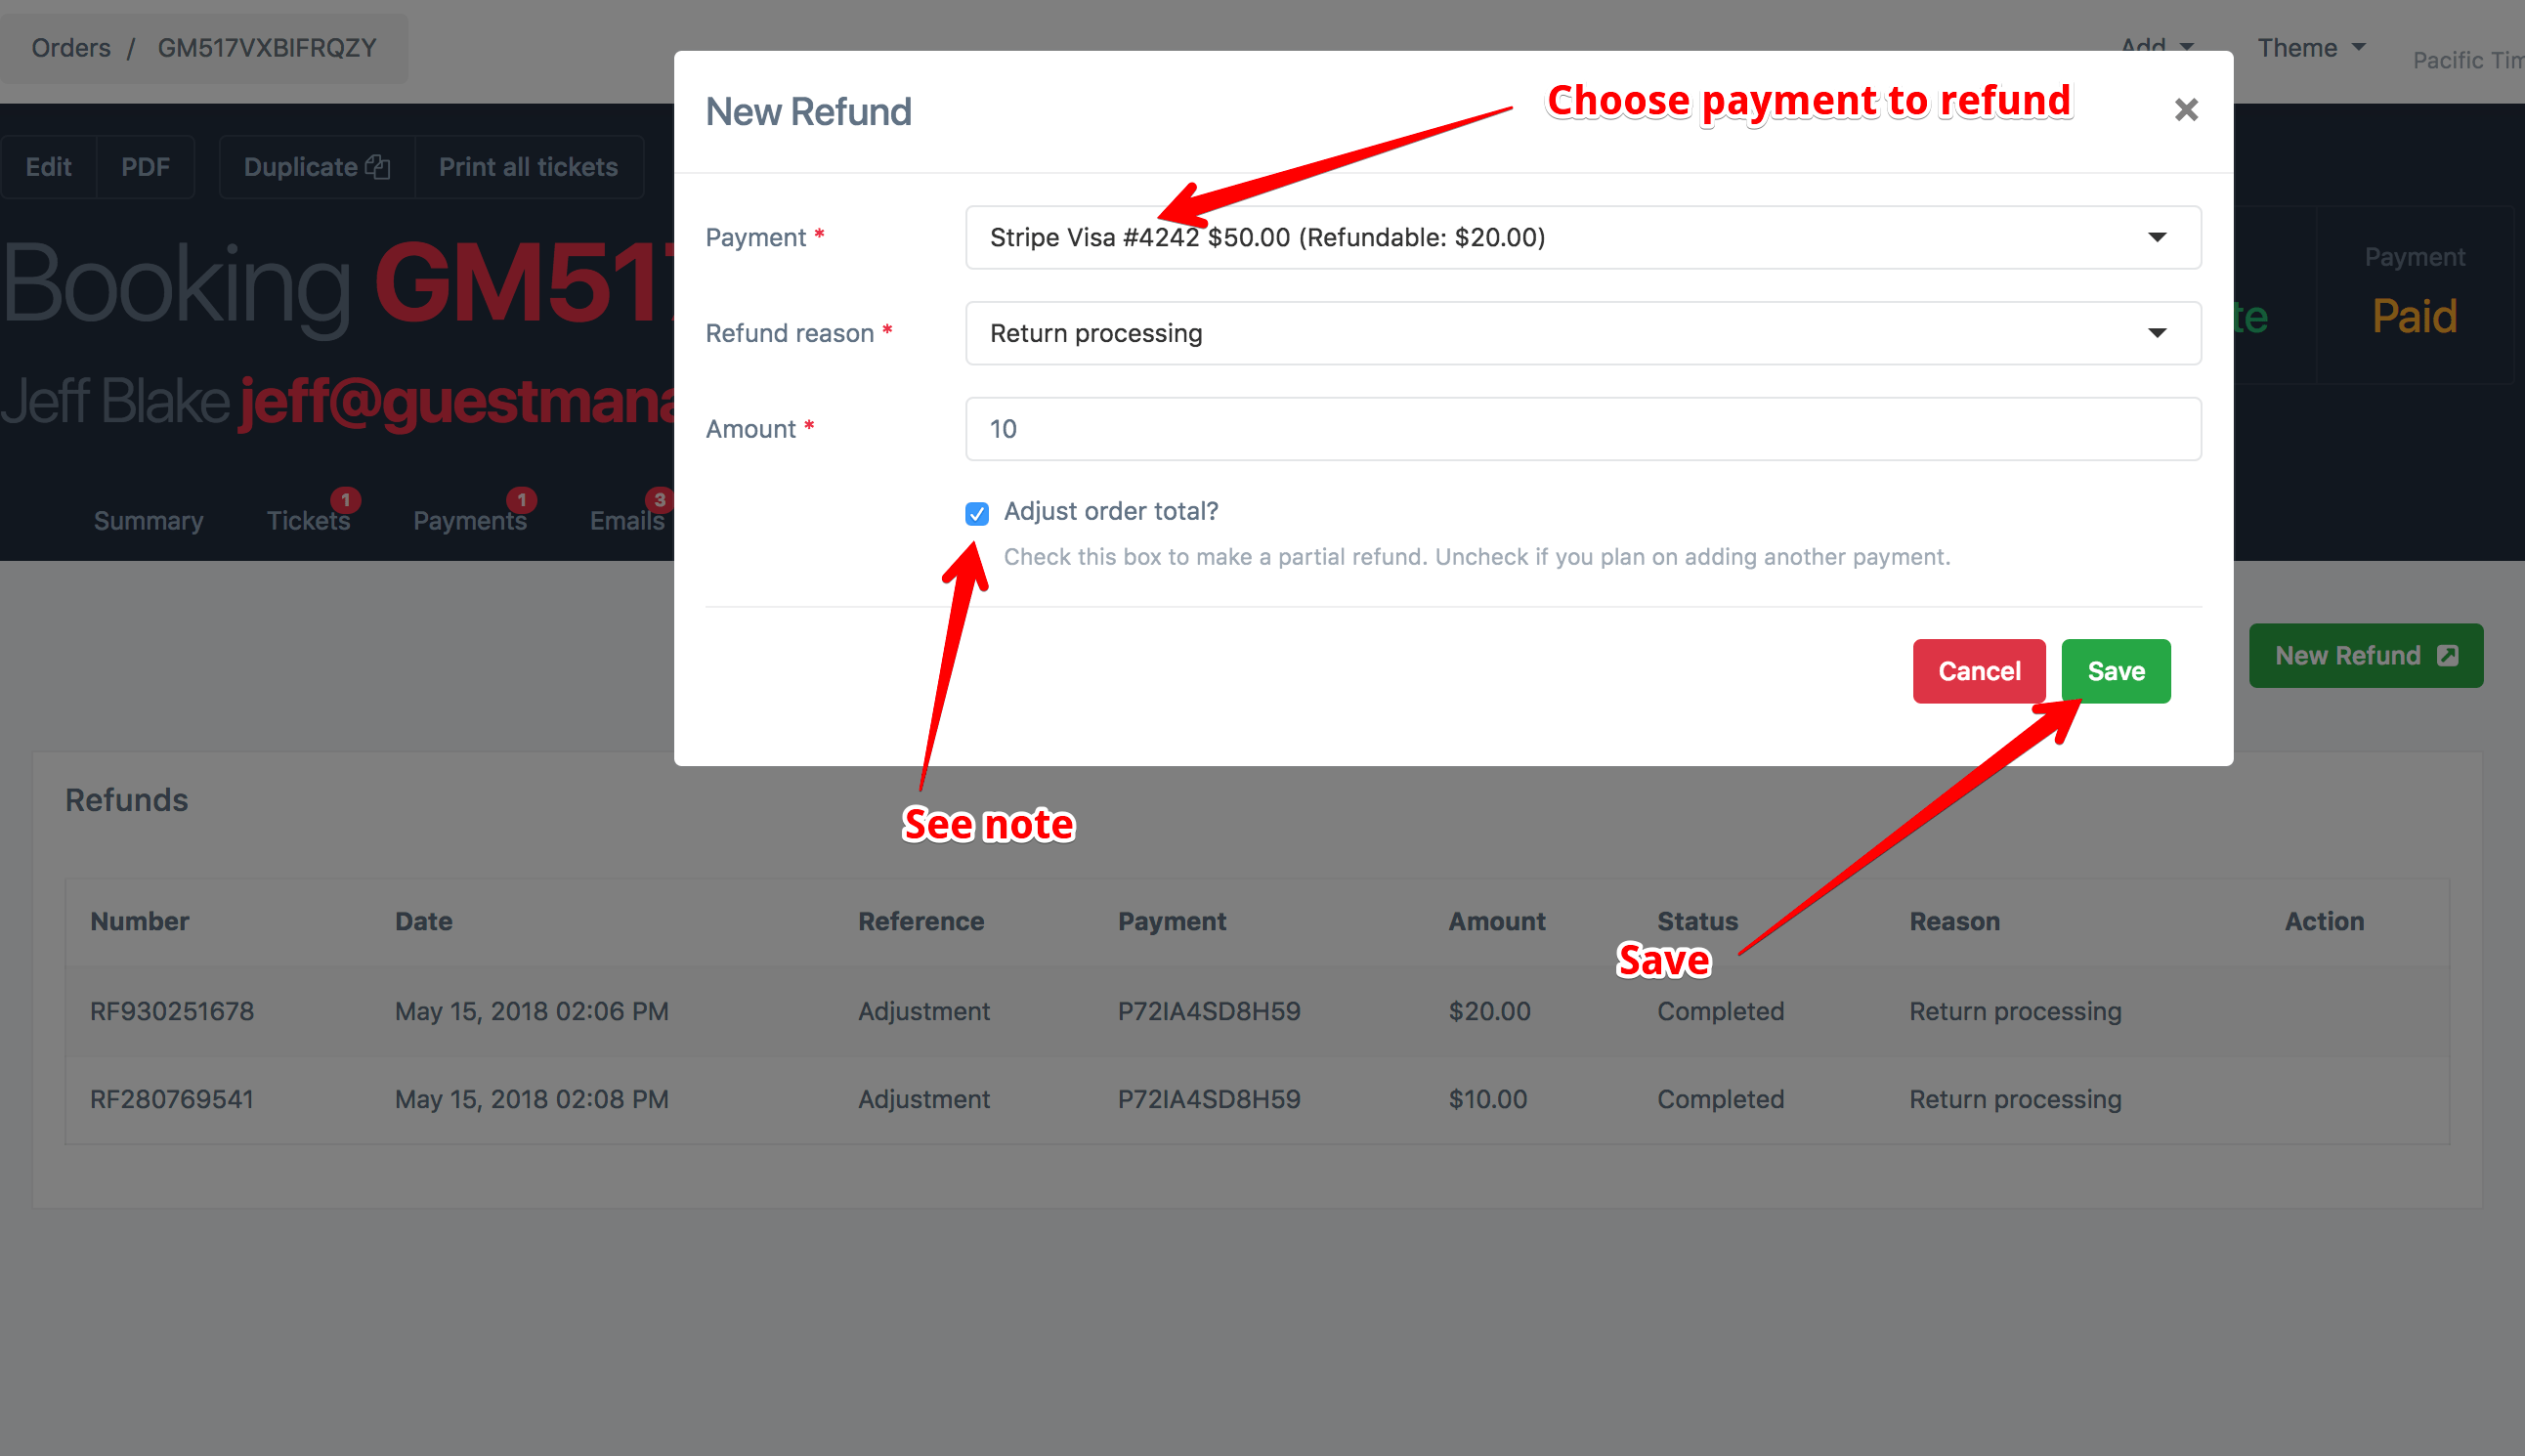
- Payment: Choose which payment to partially refund.
- Reason: Select the default reason.
- Amount: Enter the amount to refund
- “Adjust order total”: Leave this checked. When checked, the order total will be updated to reflect the refunded amount. For example, an order of $50, with a $20 partial refund, will be updated to $30. This ensures the order payment total remains “Paid”. If you plan on adding another payment (e.g. customer would like a different credit card charged, then uncheck this box to keep the order total the same).
- Click Save.
3. Click the “Process” button
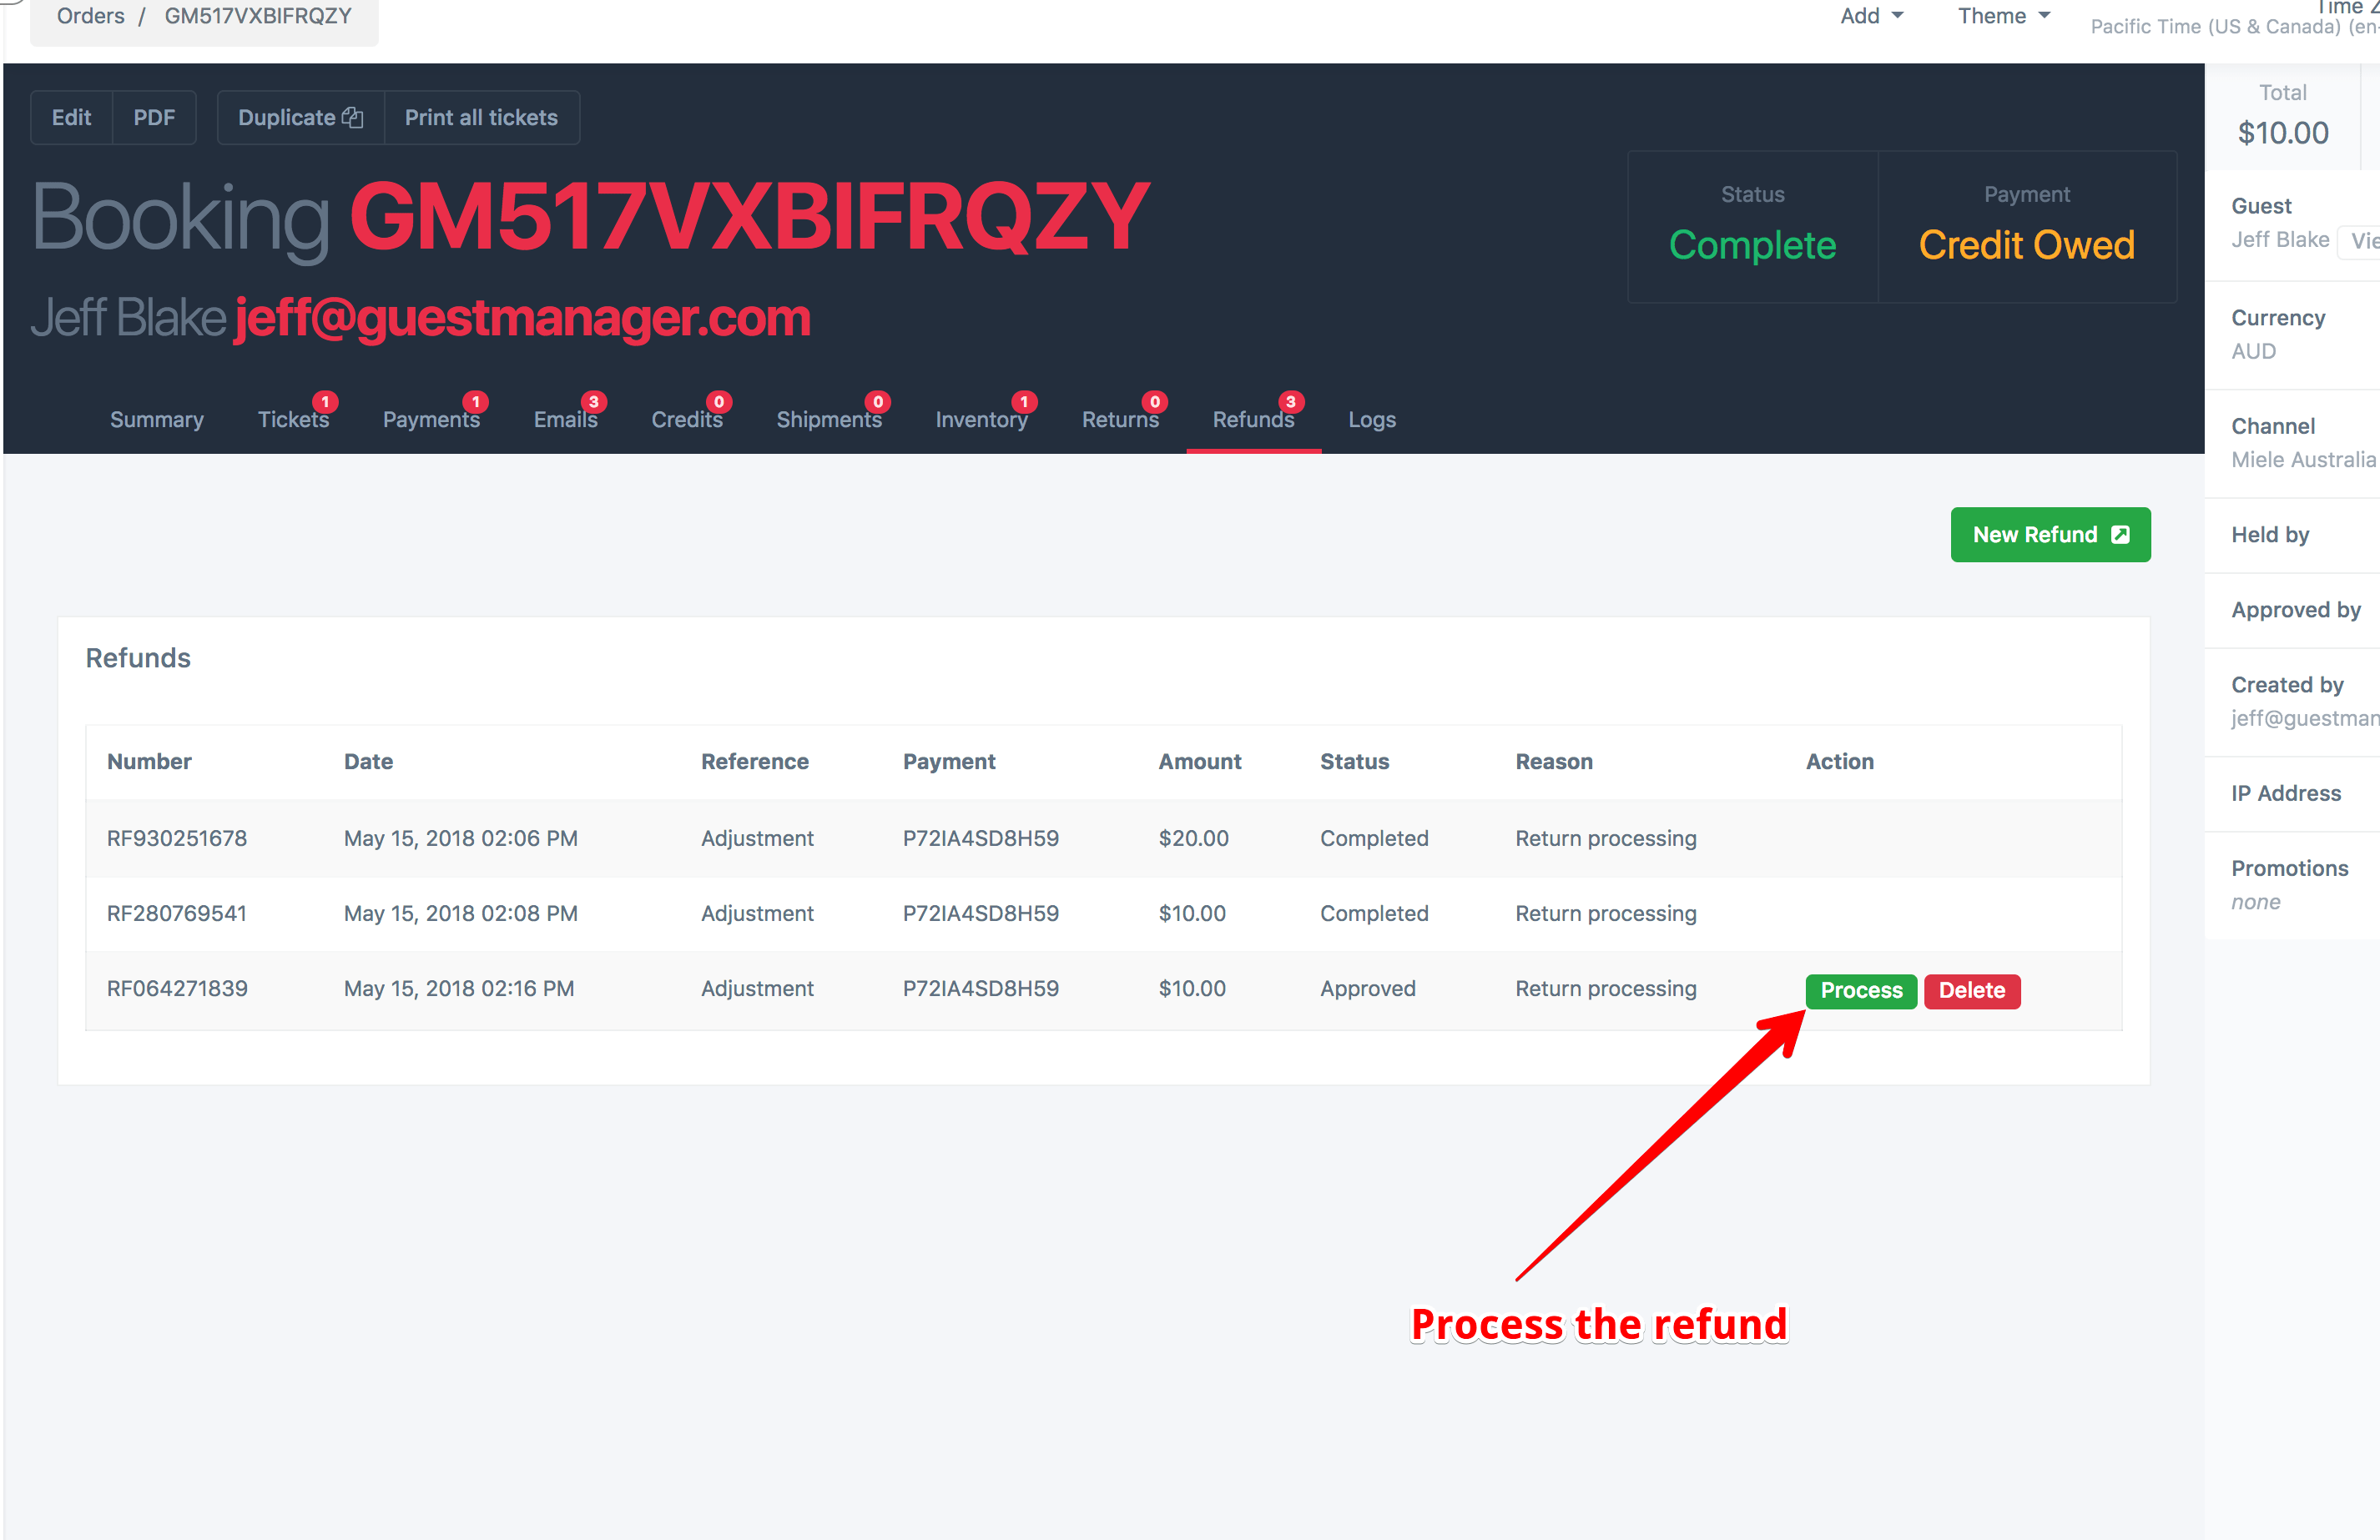
Process the refund.
