Normally clients let their customers purchase tickets via the event page. For other cases, such as issuing comps, handling special customers, etc, you can create a ticket order manually in the backend, and either comp the order, send a link to collect payment, or input the payment info yourself.
Create an order
While you can create an order from the main Orders menu, typically you want to first go into your event first, as clicking New Order from inside the event will pre-fill the form with all of the ticket options, making it much quicker and easier to select the ones you want to issue.
From Events list
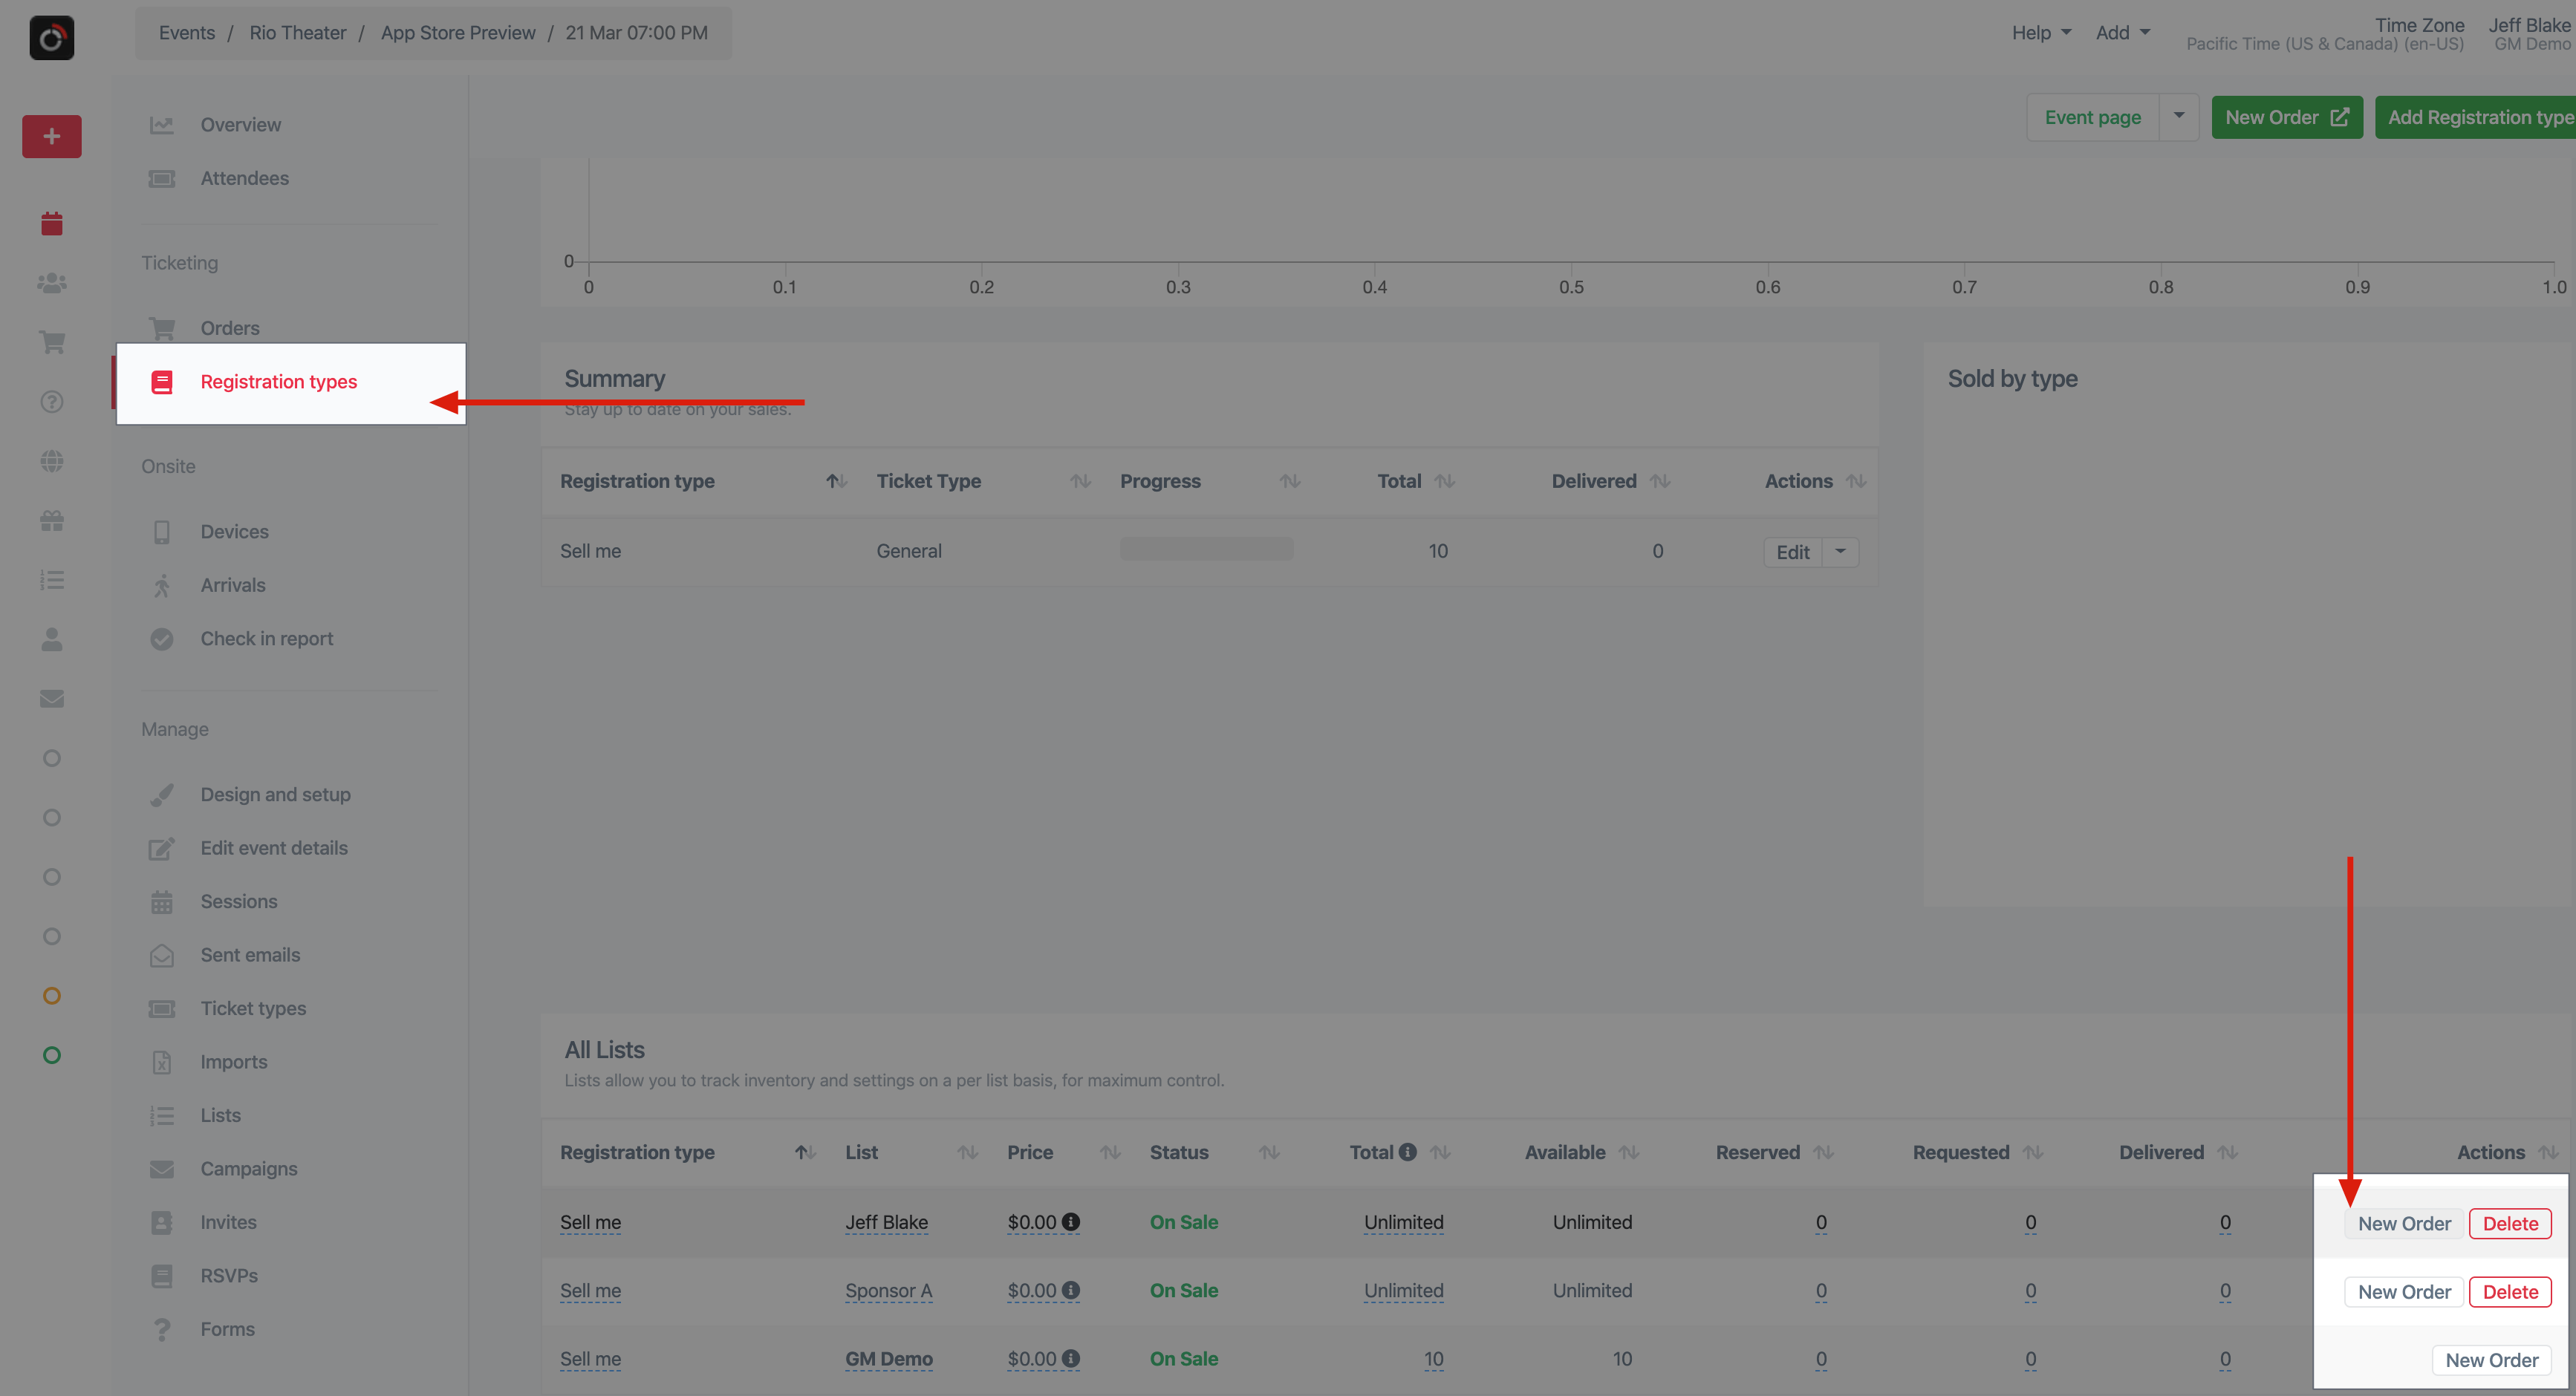
From Events > Upcoming, click the New Order button next to the event.
If this button is not visible, it means you have not yet created any Registration types for that event.

From Registration types in event
Creating an order from Registration types will pre-fill a new order with only that registration type, as opposed to prefilling all of the registration types in the previous example.
From orders
And, of course, you can create orders from Orders.

Populate the order
Contact
For the Contact field, find an existing contact in your account by searching them by name or email. Or, create a new contact by typing in their name or email, and clicking Add … (this will display a New contact popup, complete the fields and click save)
Line items
If you clicked the New order button from an event, you will see the available items already pre-populated. Remove the ones you are not interested in, and update the quantities of the ones you are keeping.
For issuing free tickets, you can either enter a price of 0 zero, or you can click “Comp” on the following screen after creating the order.
A new window will popup, with a new order pre-populated for all registration types currently in that event.
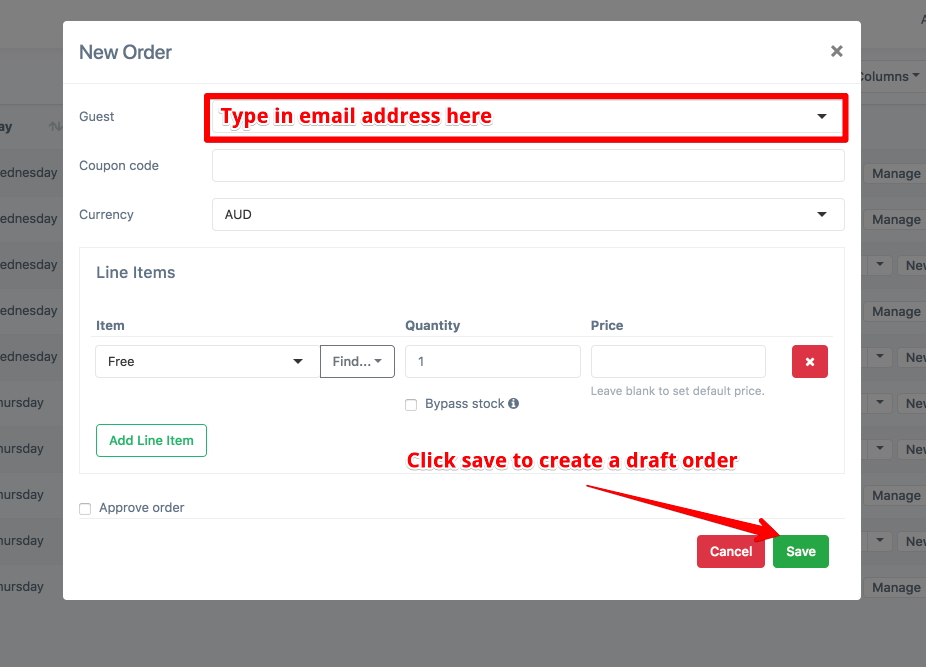
Fields:
Guest: Start typing in the email address of the guest to issue these tickets to. If the guest is already in the system, select them. If not, select the “add [email]…” button to create a new customer record. Coupon code: If applicable, provide a coupon code for this order. Currency: If multi-currency is enabled, select the appropriate currency to charge the customer in. Line items: These will be pre-populated based on the registration types created in the event. Remove items and adjust quantity as necessary.
Click “Save” to create a new draft order for the guest. The tickets will not yet be issued until the order is processed on the following screen.
Save and process order
If the order total is $0, you may simply click the large green “Process Order” button in the upper right. If successful, the screen will refresh, changing the “State” to “Complete”.
If the order requires payment, click the “Payments” tab to add a new payment.
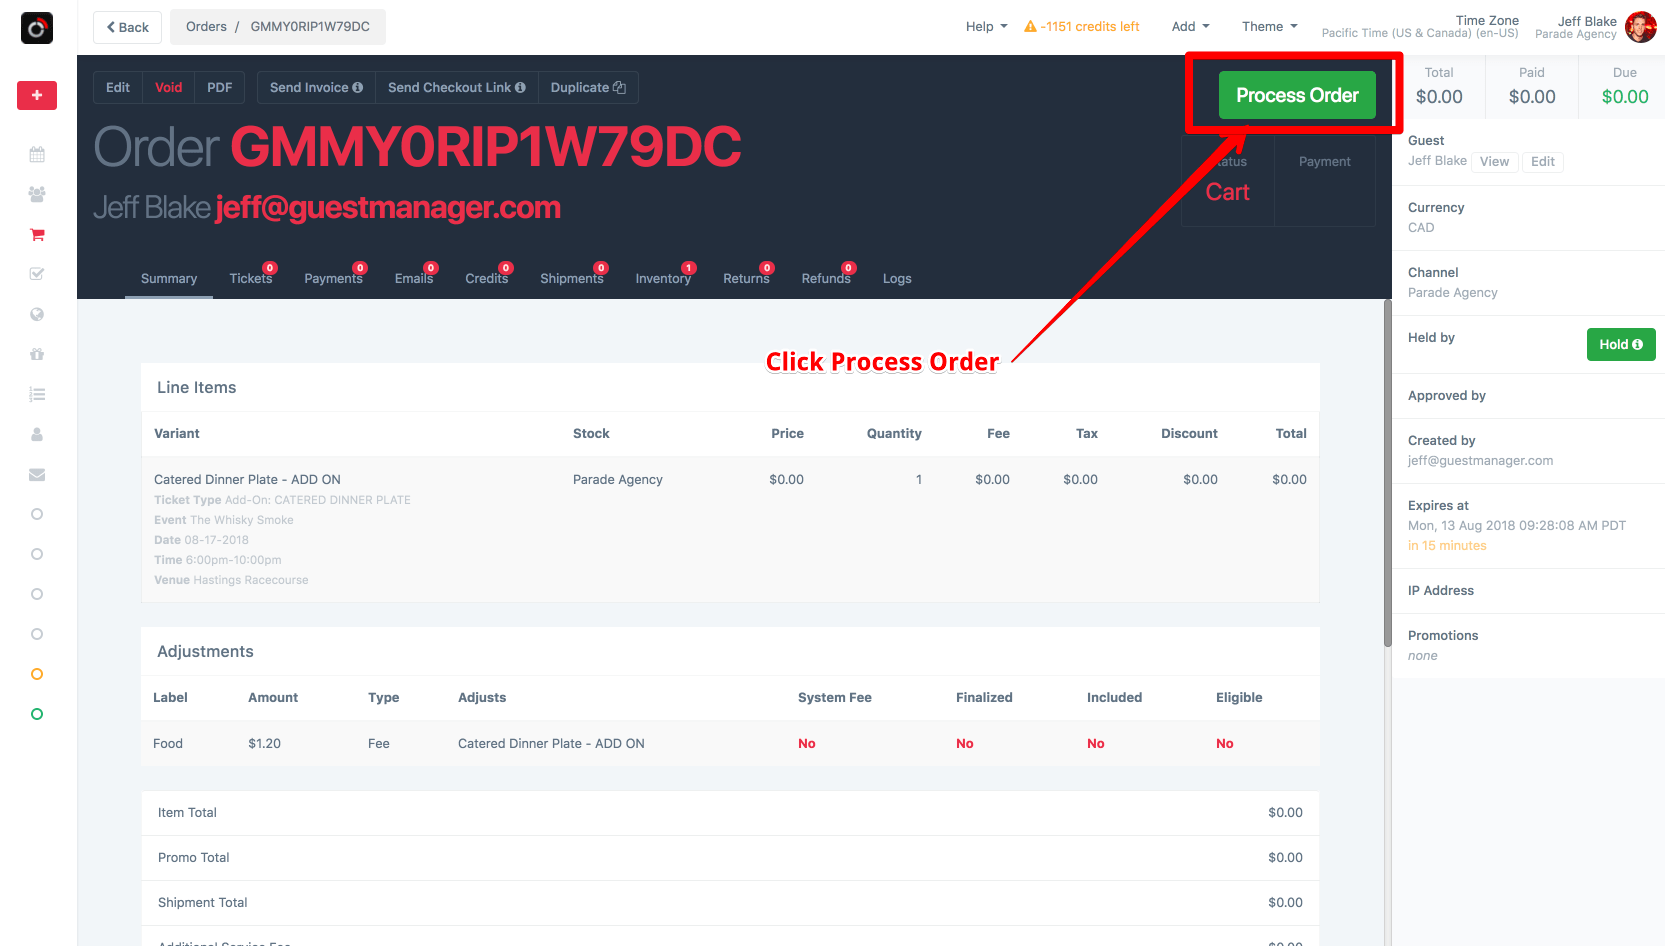
Click the big green Process Order button to issue the tickets. The page will refresh, and verify that the State is Complete, and the Payment is Paid. You can also click on the Tickets tab to see how many tickets were issued.
Adding a payment
From the “Payments” tab, select “Add Payment” and then choose the payment method. If you want to collect a credit card payment, and have not linked a payment gateway (such as Stripe, Authorize.NET, PayPal, etc) then you will need to do that first via the “Apps” menu on the left.
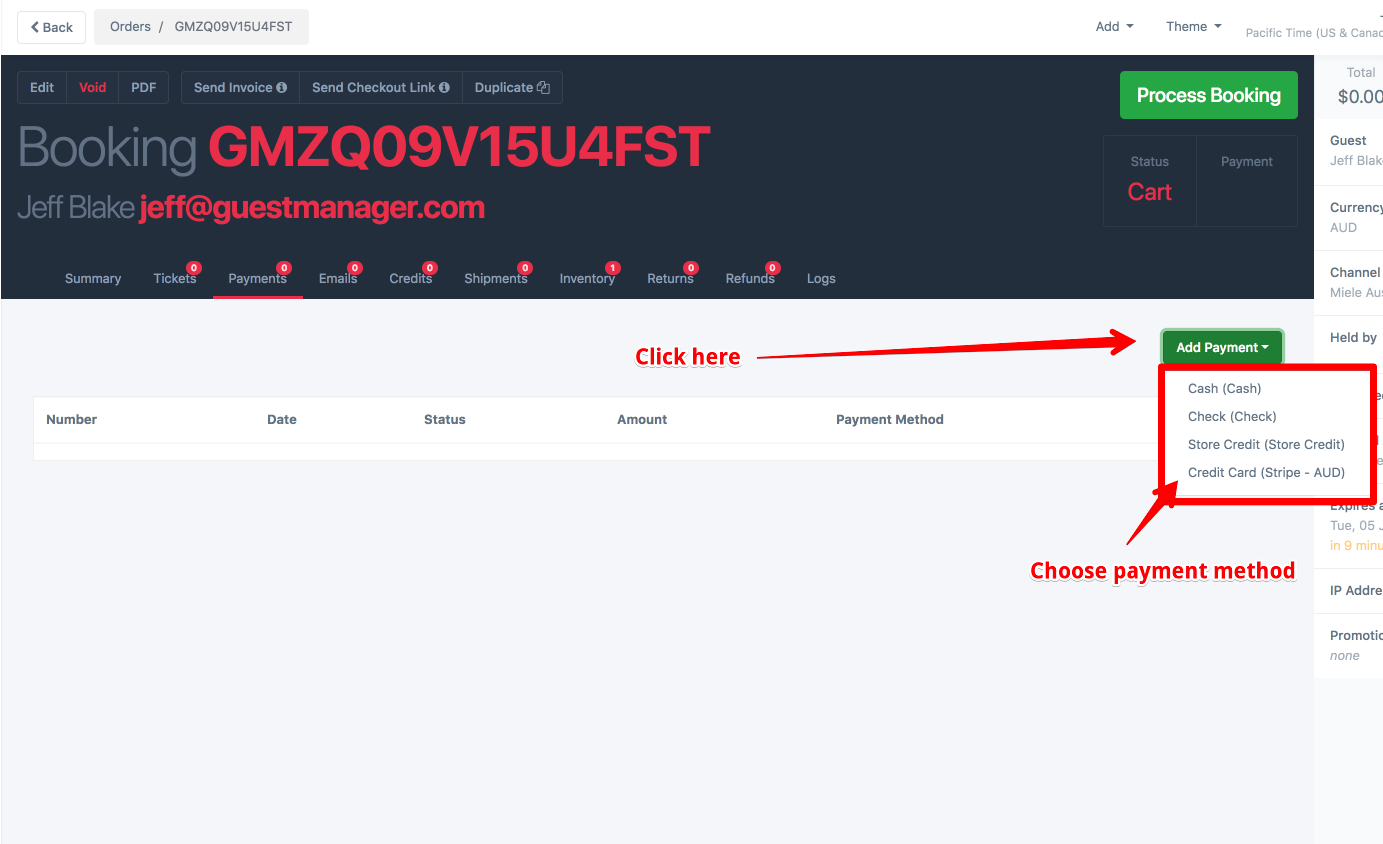
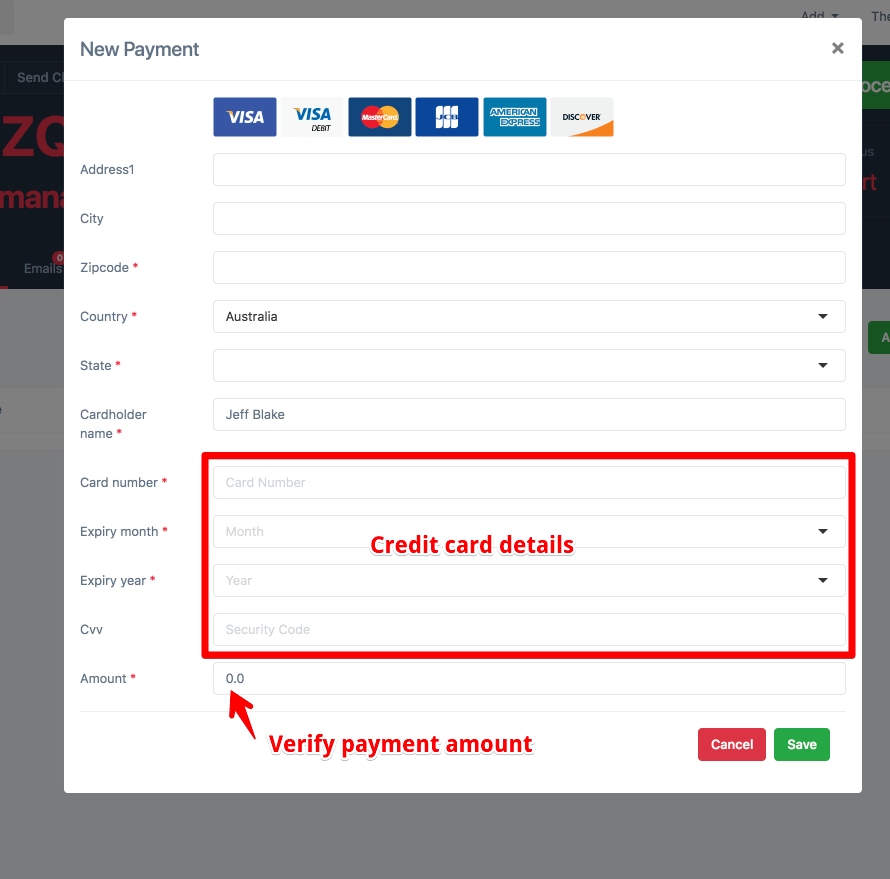
In the new payment window, fill in the details and click Save. The payment will not be processed yet.
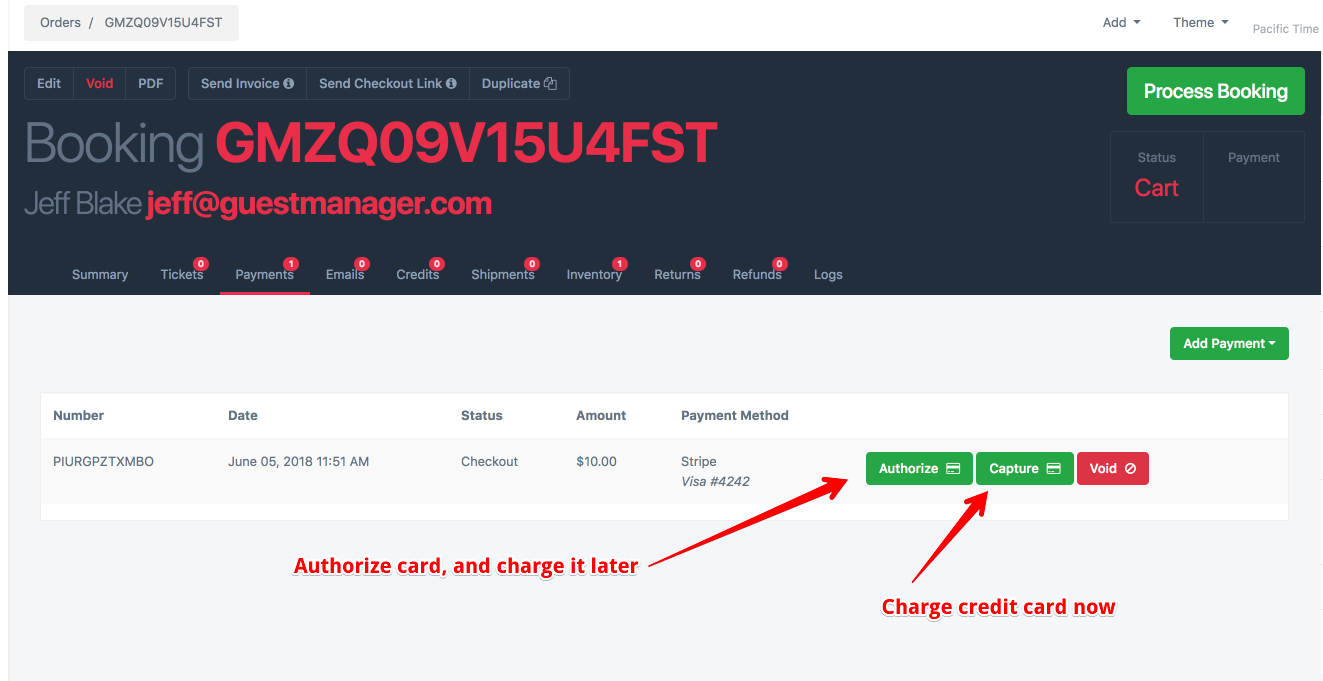
On the following screen, choose Authorize or Capture to process the payment.
Authorize: Does not charge the credit card, it simply authorizes it to make sure funds are available. Useful if you are shipping goods and want to authorize the card before packing. Capture: Processes the payment immediately and charges the credit card. Most of the time, you will want to choose Capture.
Adding guest names to individual tickets
After the order is processed, you may add names to each ticket (if applicable), by clicking on the “Tickets” tab, and then clicking “Edit” on the ticket to add a guest name for.